
Mageni Official Documentation
Getting Started
Overview
Mageni (Hebrew word for "My Shield" and "My Defender") is an open source vulnerability and attack surface management platform that aims to provide a faster, enjoyable, and leaner vulnerability management experience for modern cybersecurity programs.
Versioning Scheme
Mageni follow Semantic Versioning. Major releases are released every year (~February), while minor and patch releases may be released as often as every week. Minor and patch releases should never contain breaking changes.
Benefits of Mageni for you
Mageni will save you time, money, and resources while reducing the risk of non-compliance, financial losses, fines, and data breaches.
Real life problems that Mageni solves for you
- Assets Discovery
- Services Discovery
- Ports Discovery
- Applications Discovery
- Vulnerability Scanning
- Vulnerability Assessment
- Attack Surface Management
- Security Observability
- Vulnerability Reporting
- Vulnerability Remediation
- Vulnerability Prioritization
- Vulnerability Validation
- Addressing Vulnerabilities for Compliance with PCI DSS, NIST, HIPAA, ISO, NERC, FISMA, NIS
- Security Audits
- IoT, OT, and SCADA Security Testing
- Hardening Testing
Requirements
OS Requirements
The following OS and platforms are supported.
| OS | Version | Supported |
|---|---|---|
| Windows | Windows 10 Pro/Enterprise/Education v 1803 or later, or any Windows 10 with VirtualBox |
✅ |
| Linux | Any version that supports snap:
|
✅ |
| macOS | Any version with Brew | ✅ |
Hardware Requirements
| Hosts Scanned | CPU Cores | Memory | Disk Space |
|---|---|---|---|
| 512 active IPs | 4@2GHz cores | 8 GB RAM | 30 GB |
| 2,500 active IPs | 6@2GHz cores | 12 GB RAM | 60 GB |
| 10,000 active IPs | 16@3GHz cores | 16 GB RAM | 250 GB |
| 25,000 active IPs | 4@2GHz cores | 32 GB RAM | 1 TB |
| 100,000 active IPs | 32@2GHz cores | 64 GB RAM | 2 TB |
Network Requirements
- The local network must be configured to allow outbound HTTPS (port 443) access to the Internet to download the updates and vulnerability database
- The IP addresses for the hosts to be scanned must be accessible to the scanner
Software Requirements
Multipass, a tool created by Canonical, the developers of Ubuntu, to generate cloud-style Ubuntu VMs quickly on Linux, macOS, and Windows, is required.
How to Install
Mageni is available for macOS, Windows, and Linux. To install, just follow these instructions:
Linux
1. Download Multipass
sudo snap install multipass
2. Launch a multipass instance
multipass launch -c 2 -m 6G -d 40G -n mageni 20.04 && multipass shell mageni
3. Install Mageni
curl -sL https://www.mageni.net/installation | sudo bash
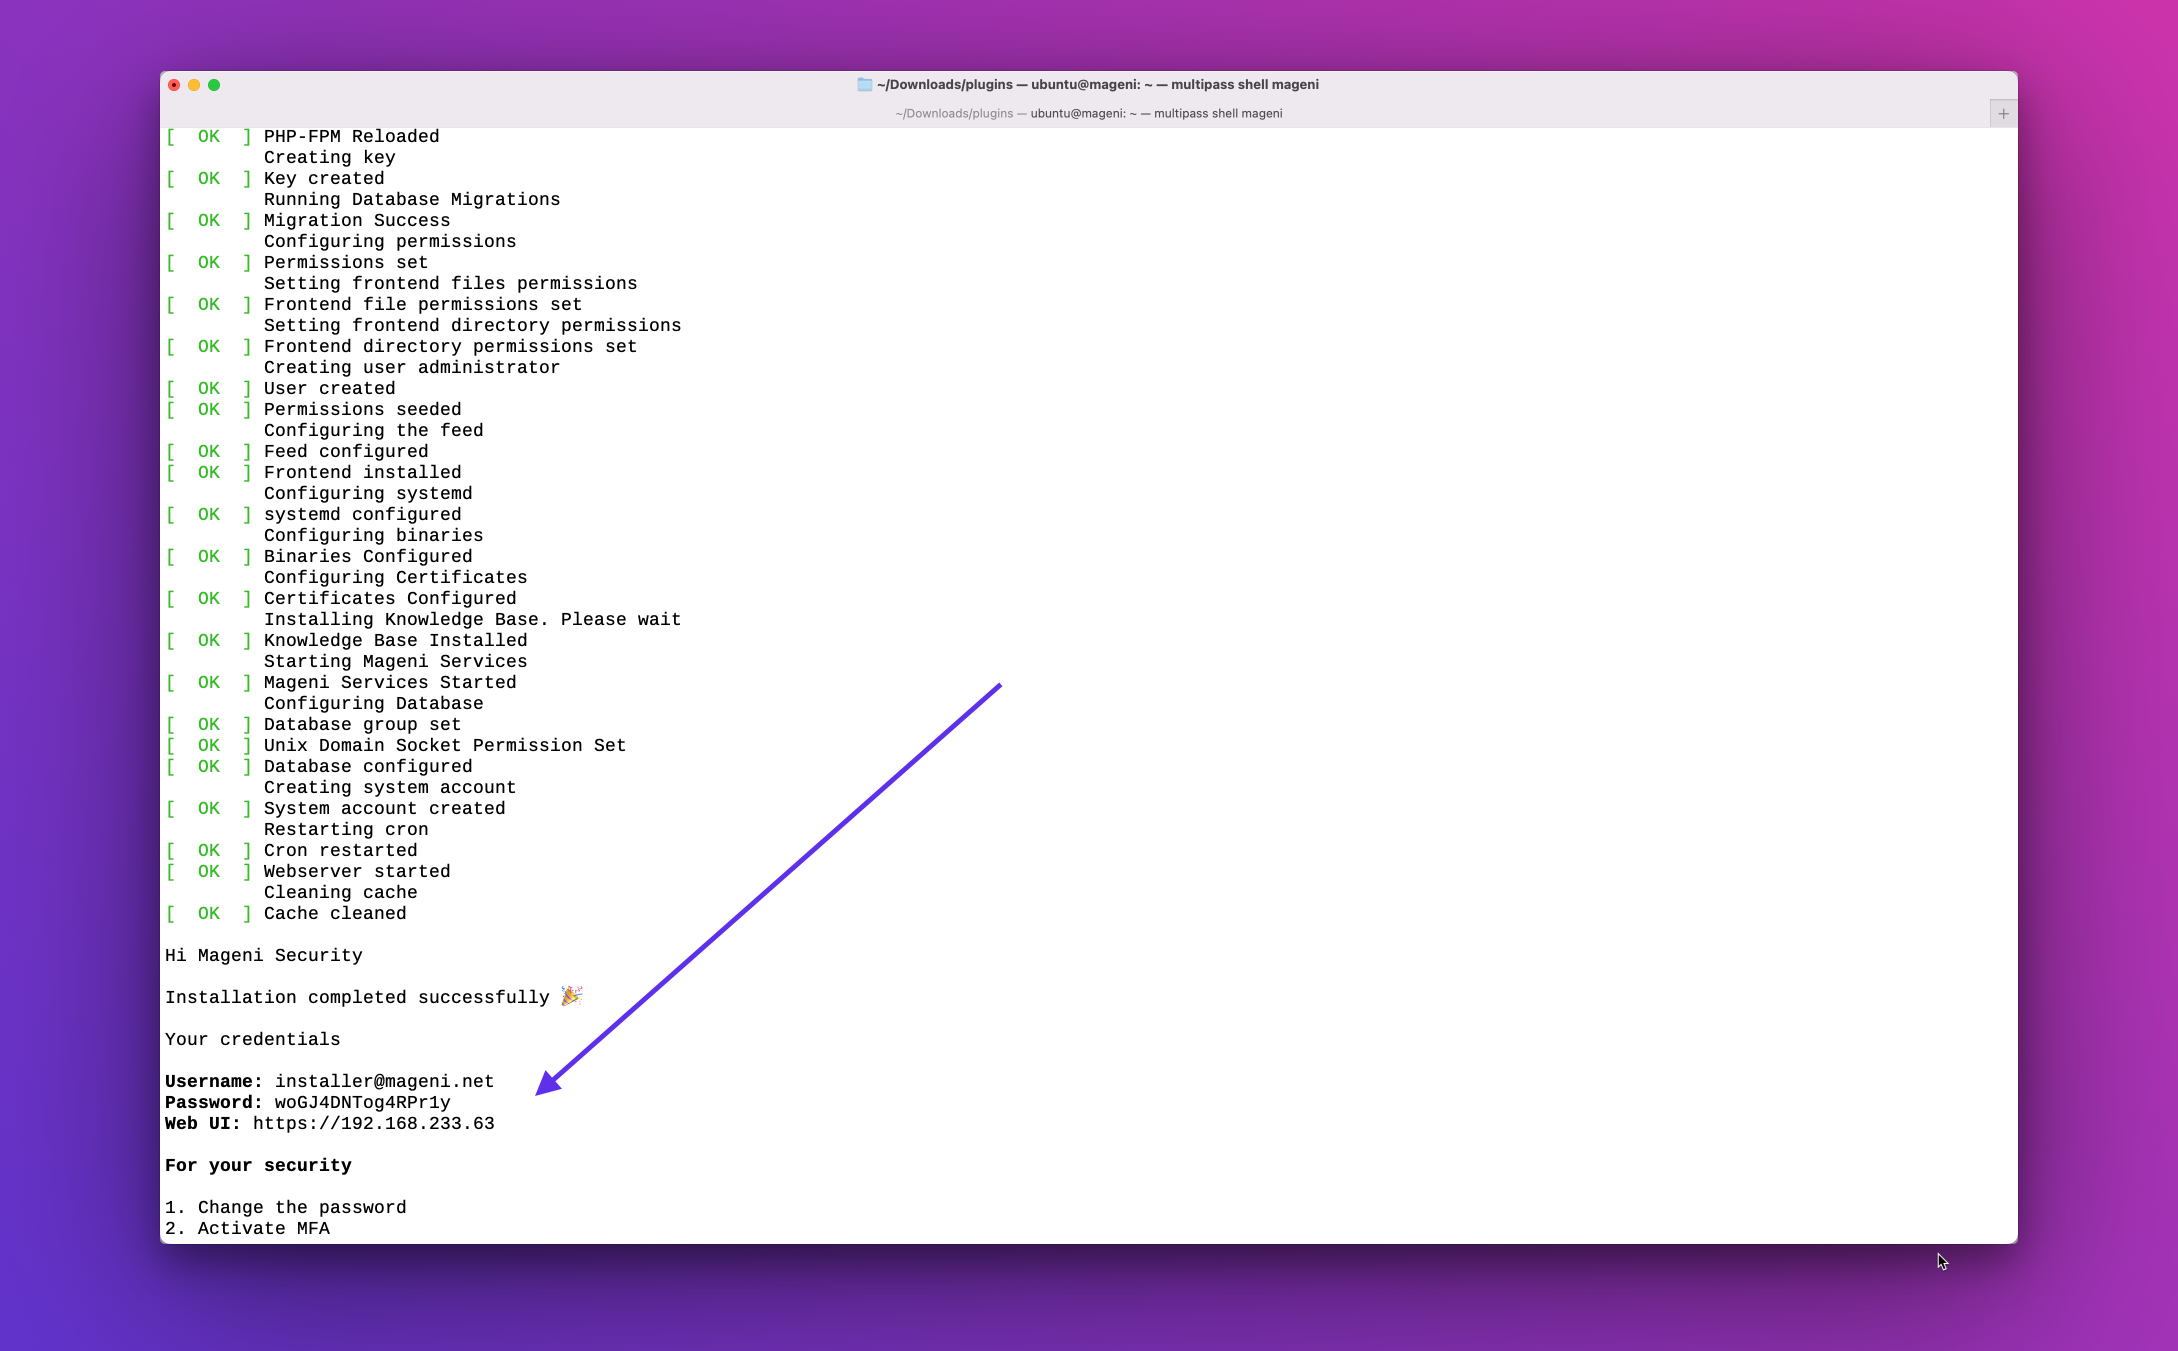
4. Once the installation is completed, you will receive the credentials to log into the Web Application and start scanning
macOS
1. If you don’t have it already, install Brew and VirtualBox. Then, to install Multipass simply execute:
brew install --cask multipass
2. Set the local driver
multipass set local.driver=qemu
3. Launch a multipass instance
multipass launch -c 2 -m 6G -d 40G -n mageni 20.04 && multipass shell mageni
4. Install Mageni
curl -sL https://www.mageni.net/installation | sudo bash
5. Once the installation is completed, you will receive the credentials to log into the Web Application and start scanning
Microsoft Windows
1. Download the Multipass installer for Windows
Note: You need Windows 10 Pro/Enterprise/Education v 1803 or later, or any Windows 10 with VirtualBox
2. Ensure your network is private
Make sure your local network is designated as private, otherwise Windows prevents Multipass from starting.
3. Run the installer
You need to allow the installer to gain Administrator privileges.
4. Create the multipass instance
multipass launch --cpus 2 --mem 6G --disk 40G --name mageni 20.04
5. Log into the multipass instance
multipass shell mageni
6. Install Mageni
curl -sL https://www.mageni.net/installation | sudo bash
7. Once the installation is completed, you will receive the credentials to log into the Web Application and start scanning
First Time Login
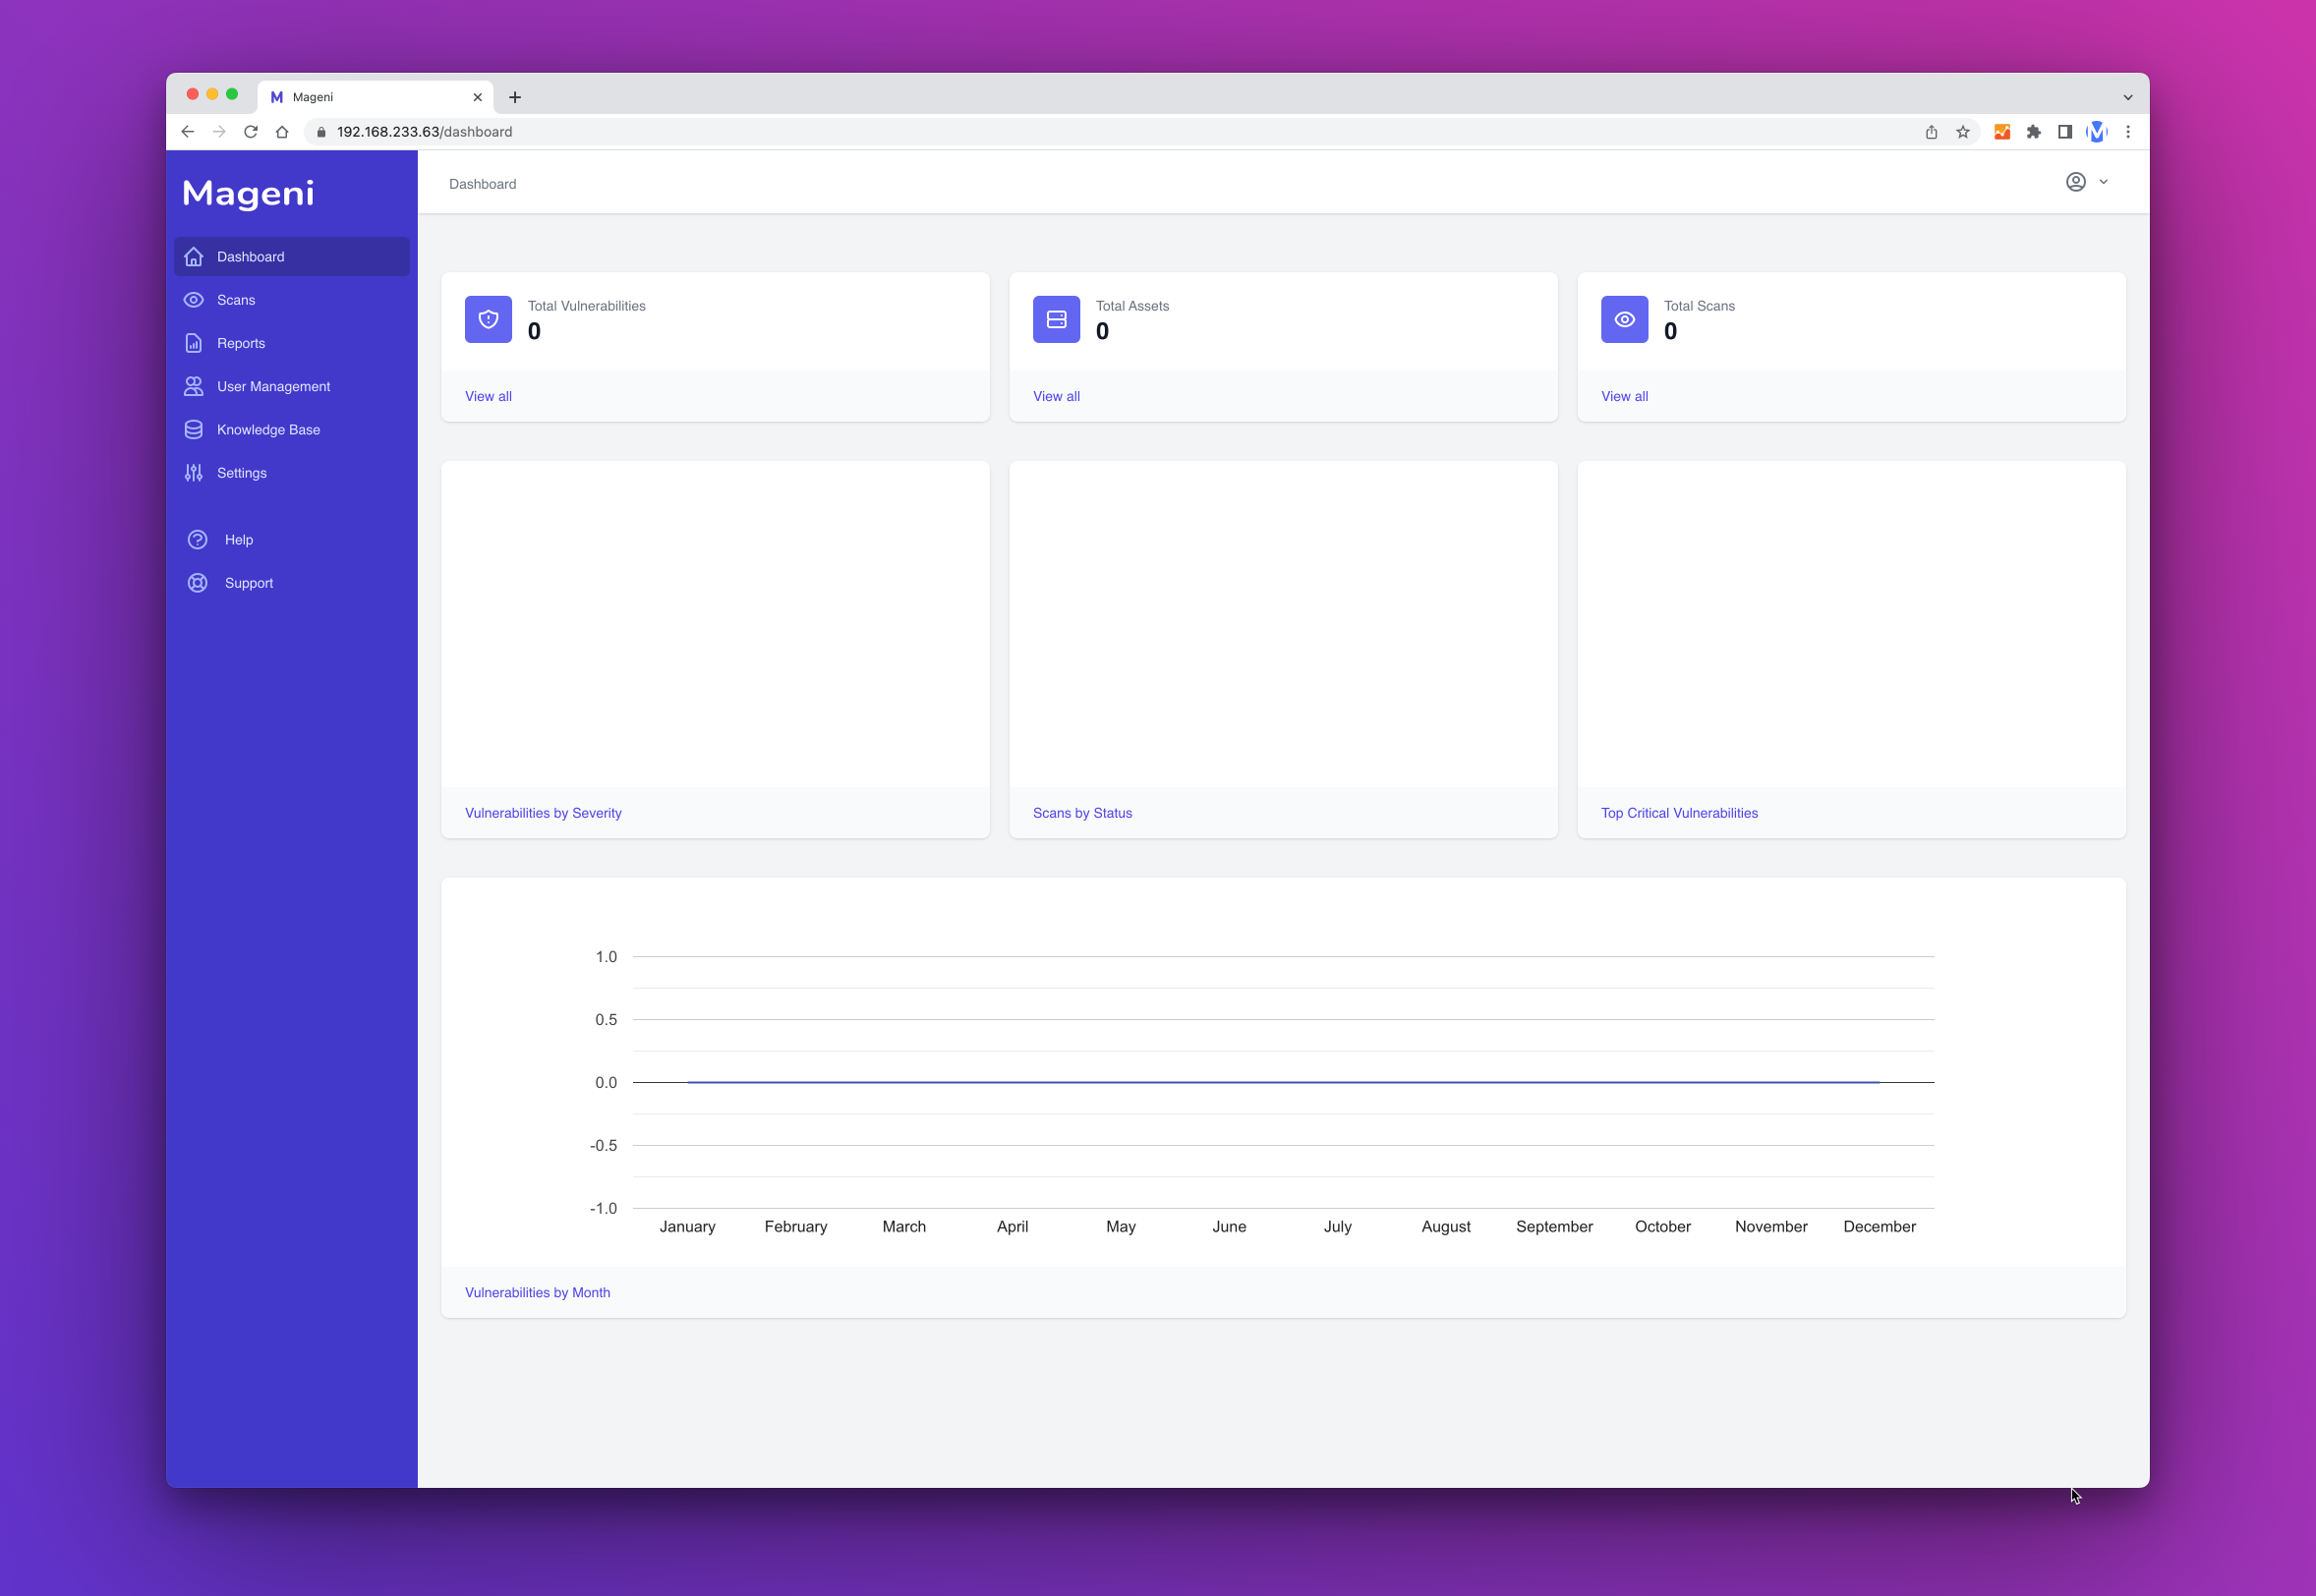
Dashboard
The first time that you log into Mageni you will be presented with the dashboard.
Types of Vulnerability Scans
Mageni can help you perform vulnerability scans to the internal and external network, cloud environments (AWS, Azure, Google, etc) and IoT, OT, and SCADA devices.
Now that you have installed Mageni, you can perform several types of vulnerabilities scans:
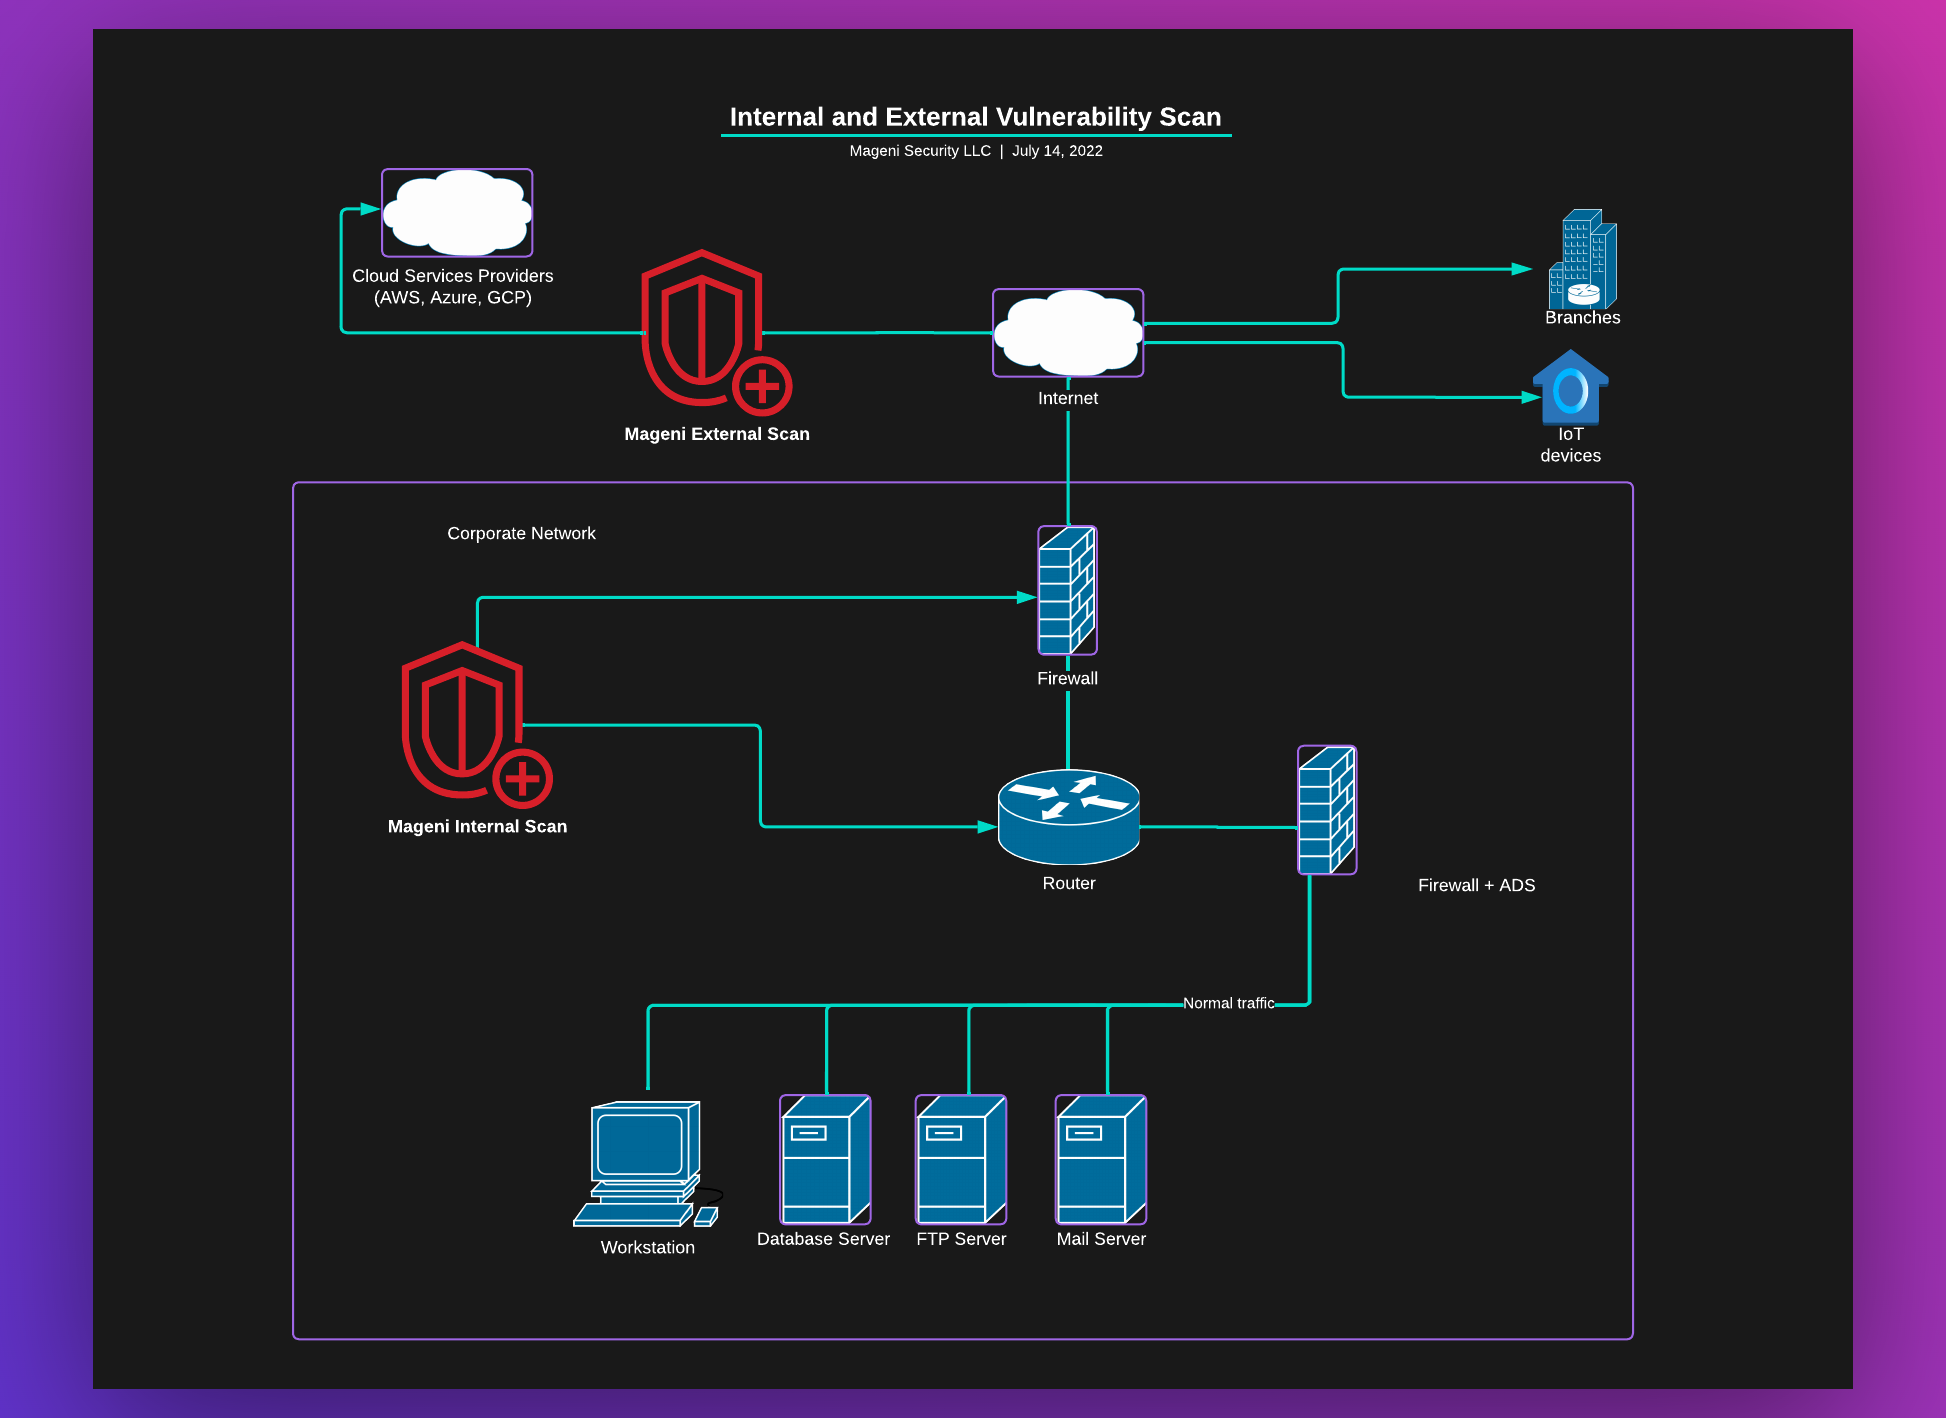
Internal Scan
An internal vulnerability scan is the process of searching for vulnerabilities from within the corporate network
External Scan
This is a scan to search for vulnerabilities in the network perimeter. Like an external attacker would do.
The difference between an internal scan and the external scan is that the internal scan is within your network and the external scan is in the perimeter.
Credentialed Scan
This scan allows users to log into the system and see its vulnerabilities from a trusted source’s perspective. This process identifies vulnerabilities from workstations, network hosts, and servers while giving users a better understanding of the system’s patch management and configurations
Non-Credentialed Scan
A non-credentialed scan offers the perspective of someone who infiltrated the system. Users can remotely check for security risks like unsecured web servers and misconfigured firewalls. By employing both types of scans, you can be sure sensitive information is safe on your networks
A credentialed scan will find more vulnerabilities than a non-credentialed scan and it is necessary for gray-box testing.
Run your first scan
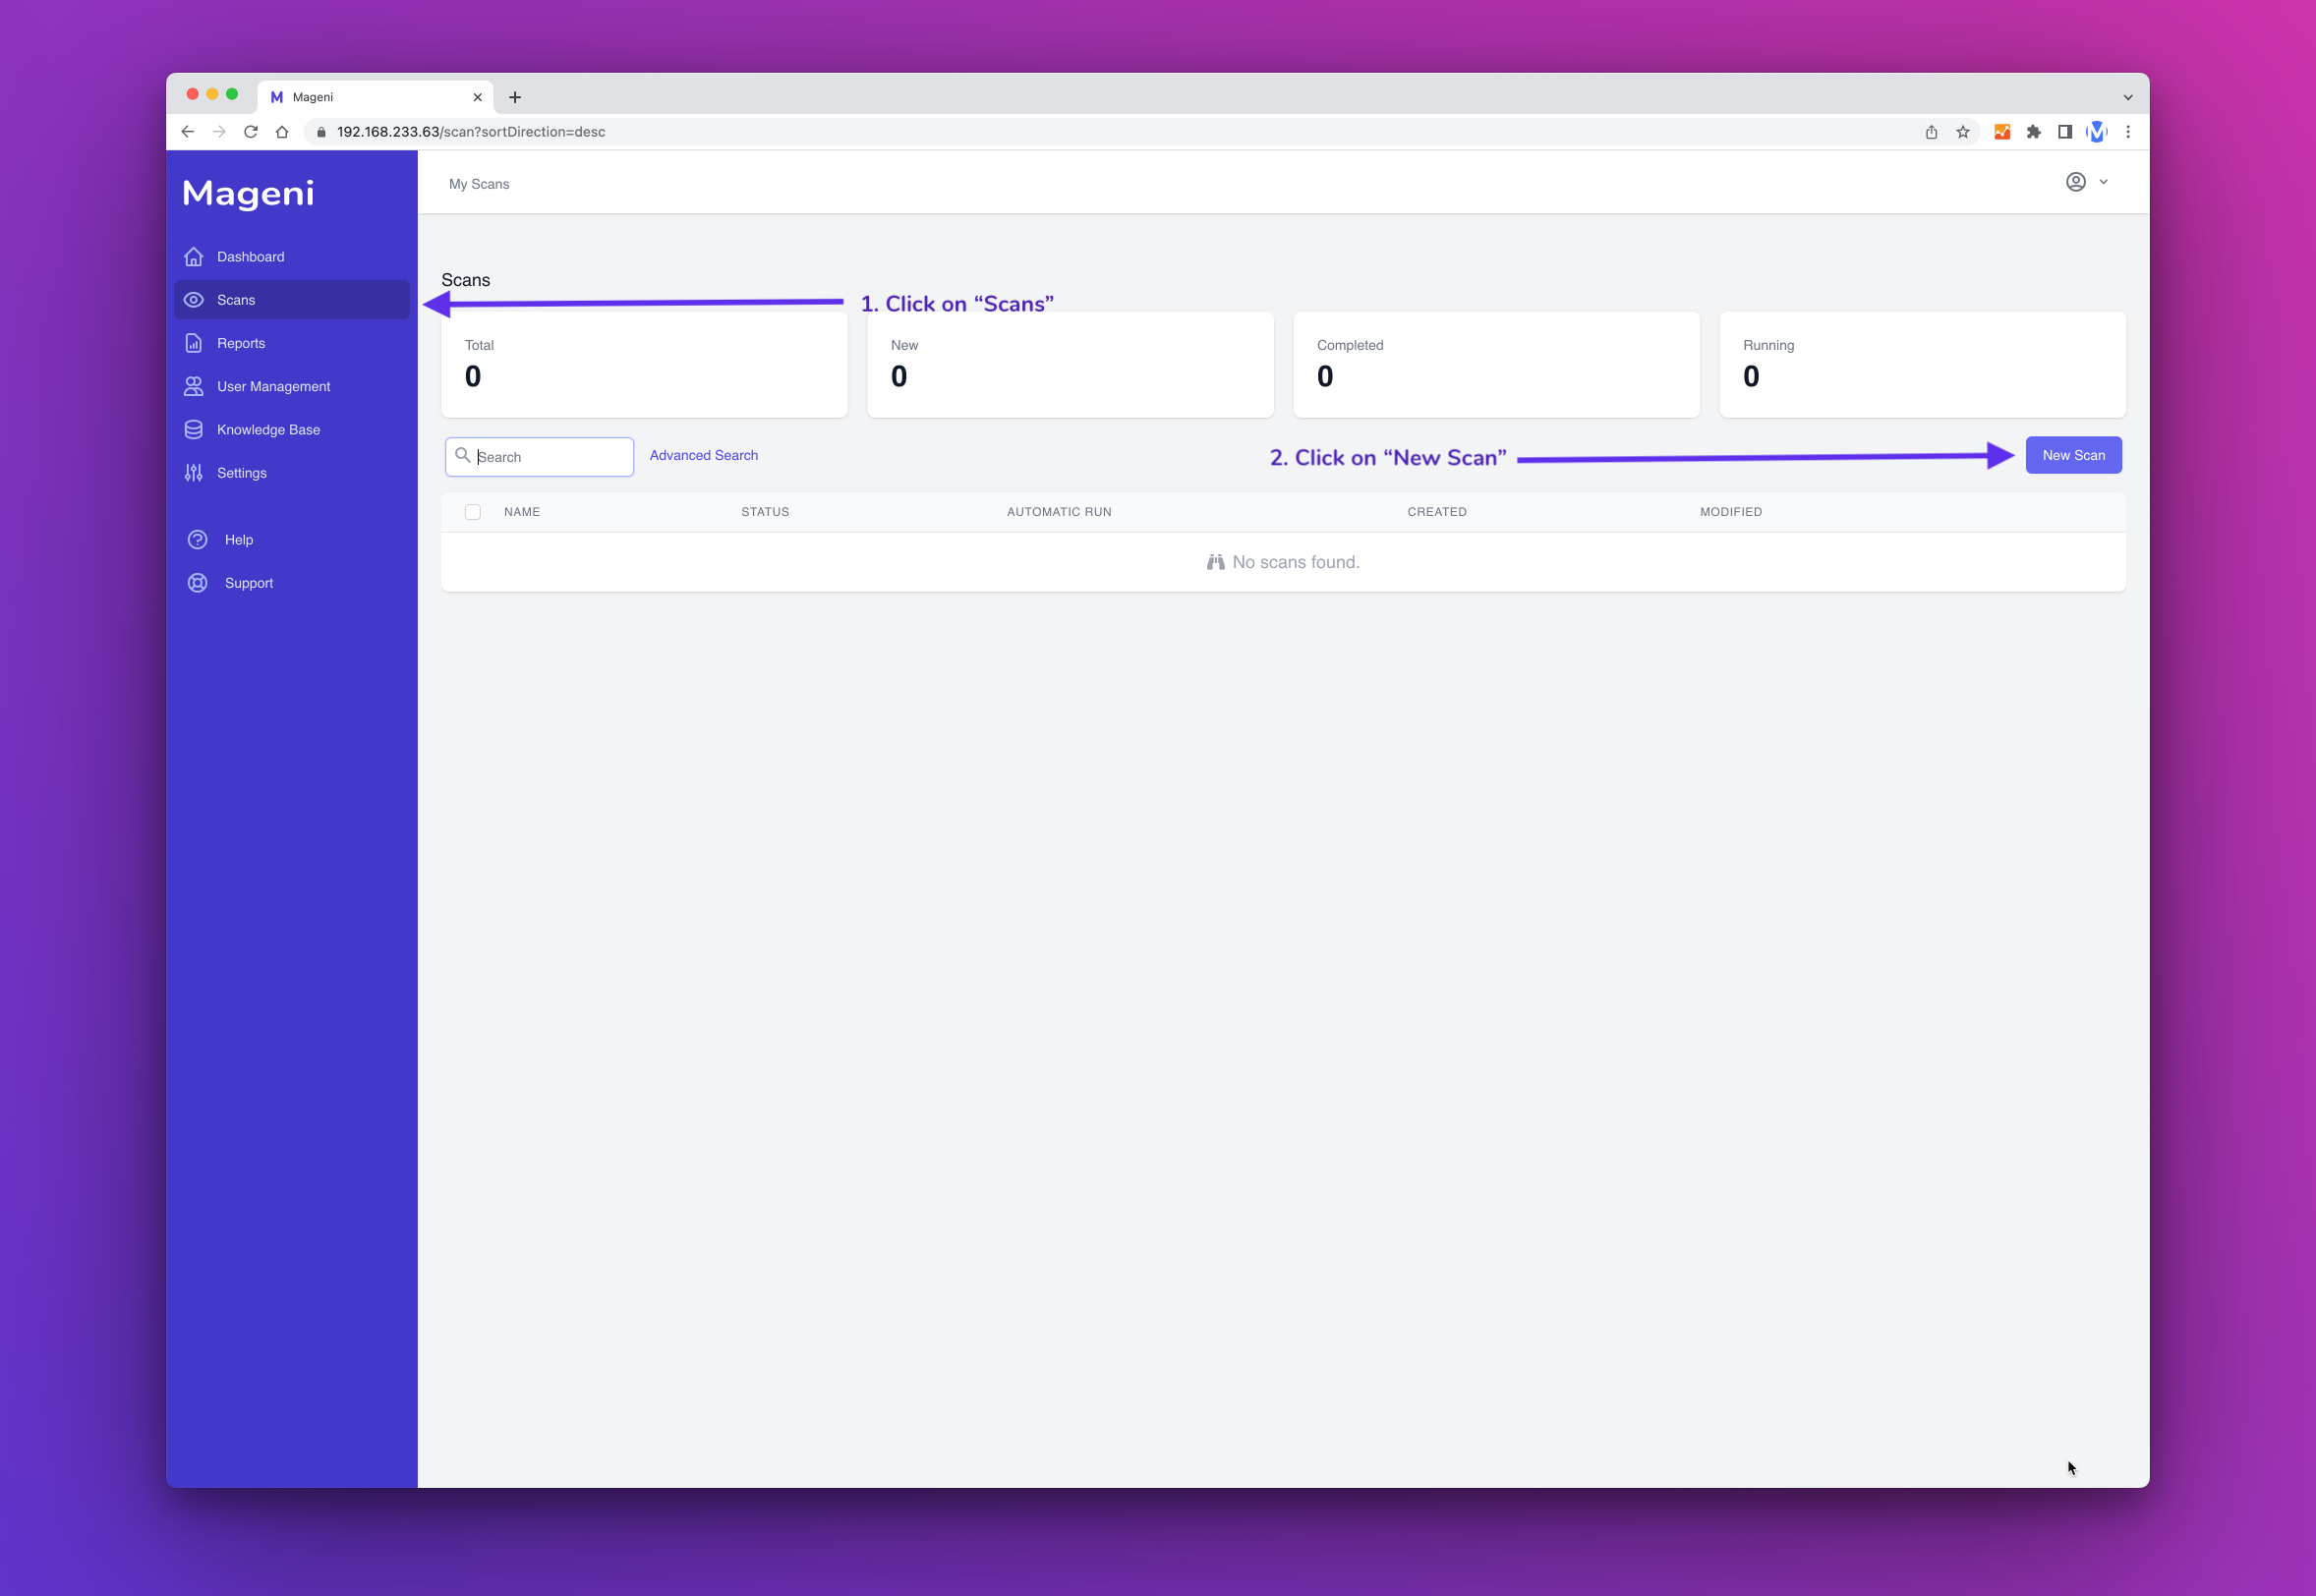
Create a Scan
For this example we will create a basic scan without credentials, schedules or notifications.
Go to "Scans" and then click the "New Scan" button.
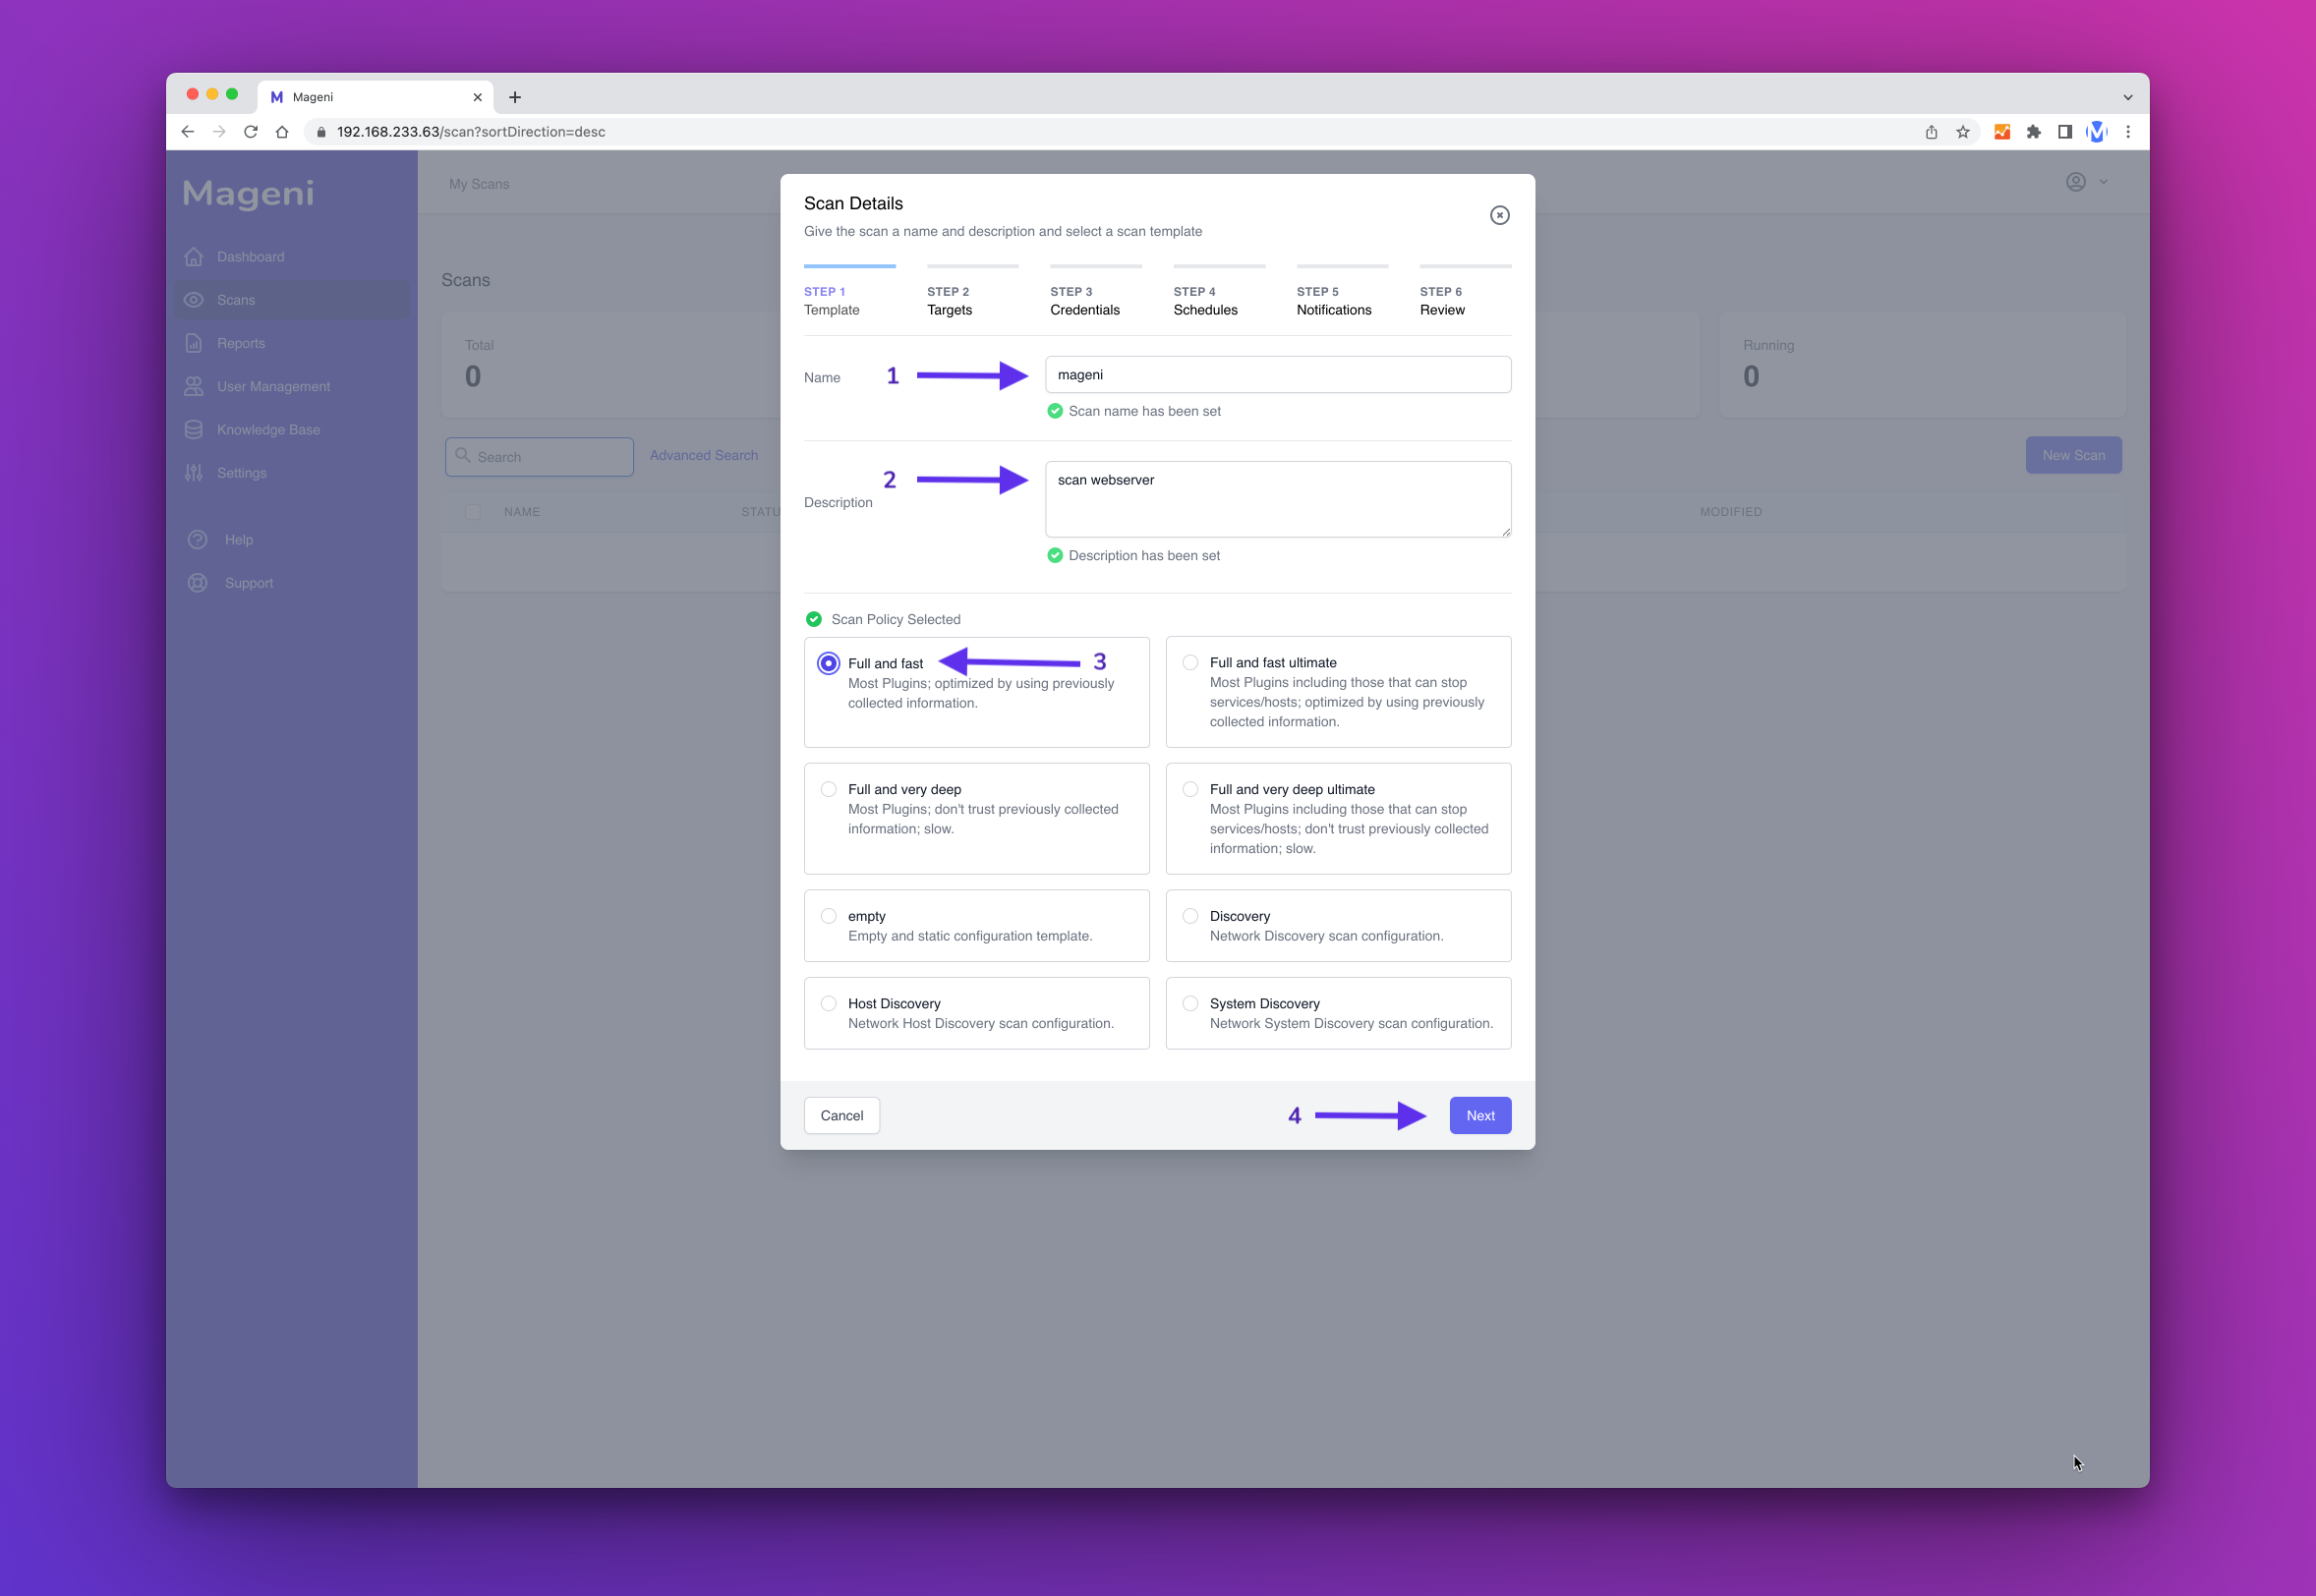
A window will show up, here you can define the name, description and scanning template of your scan.
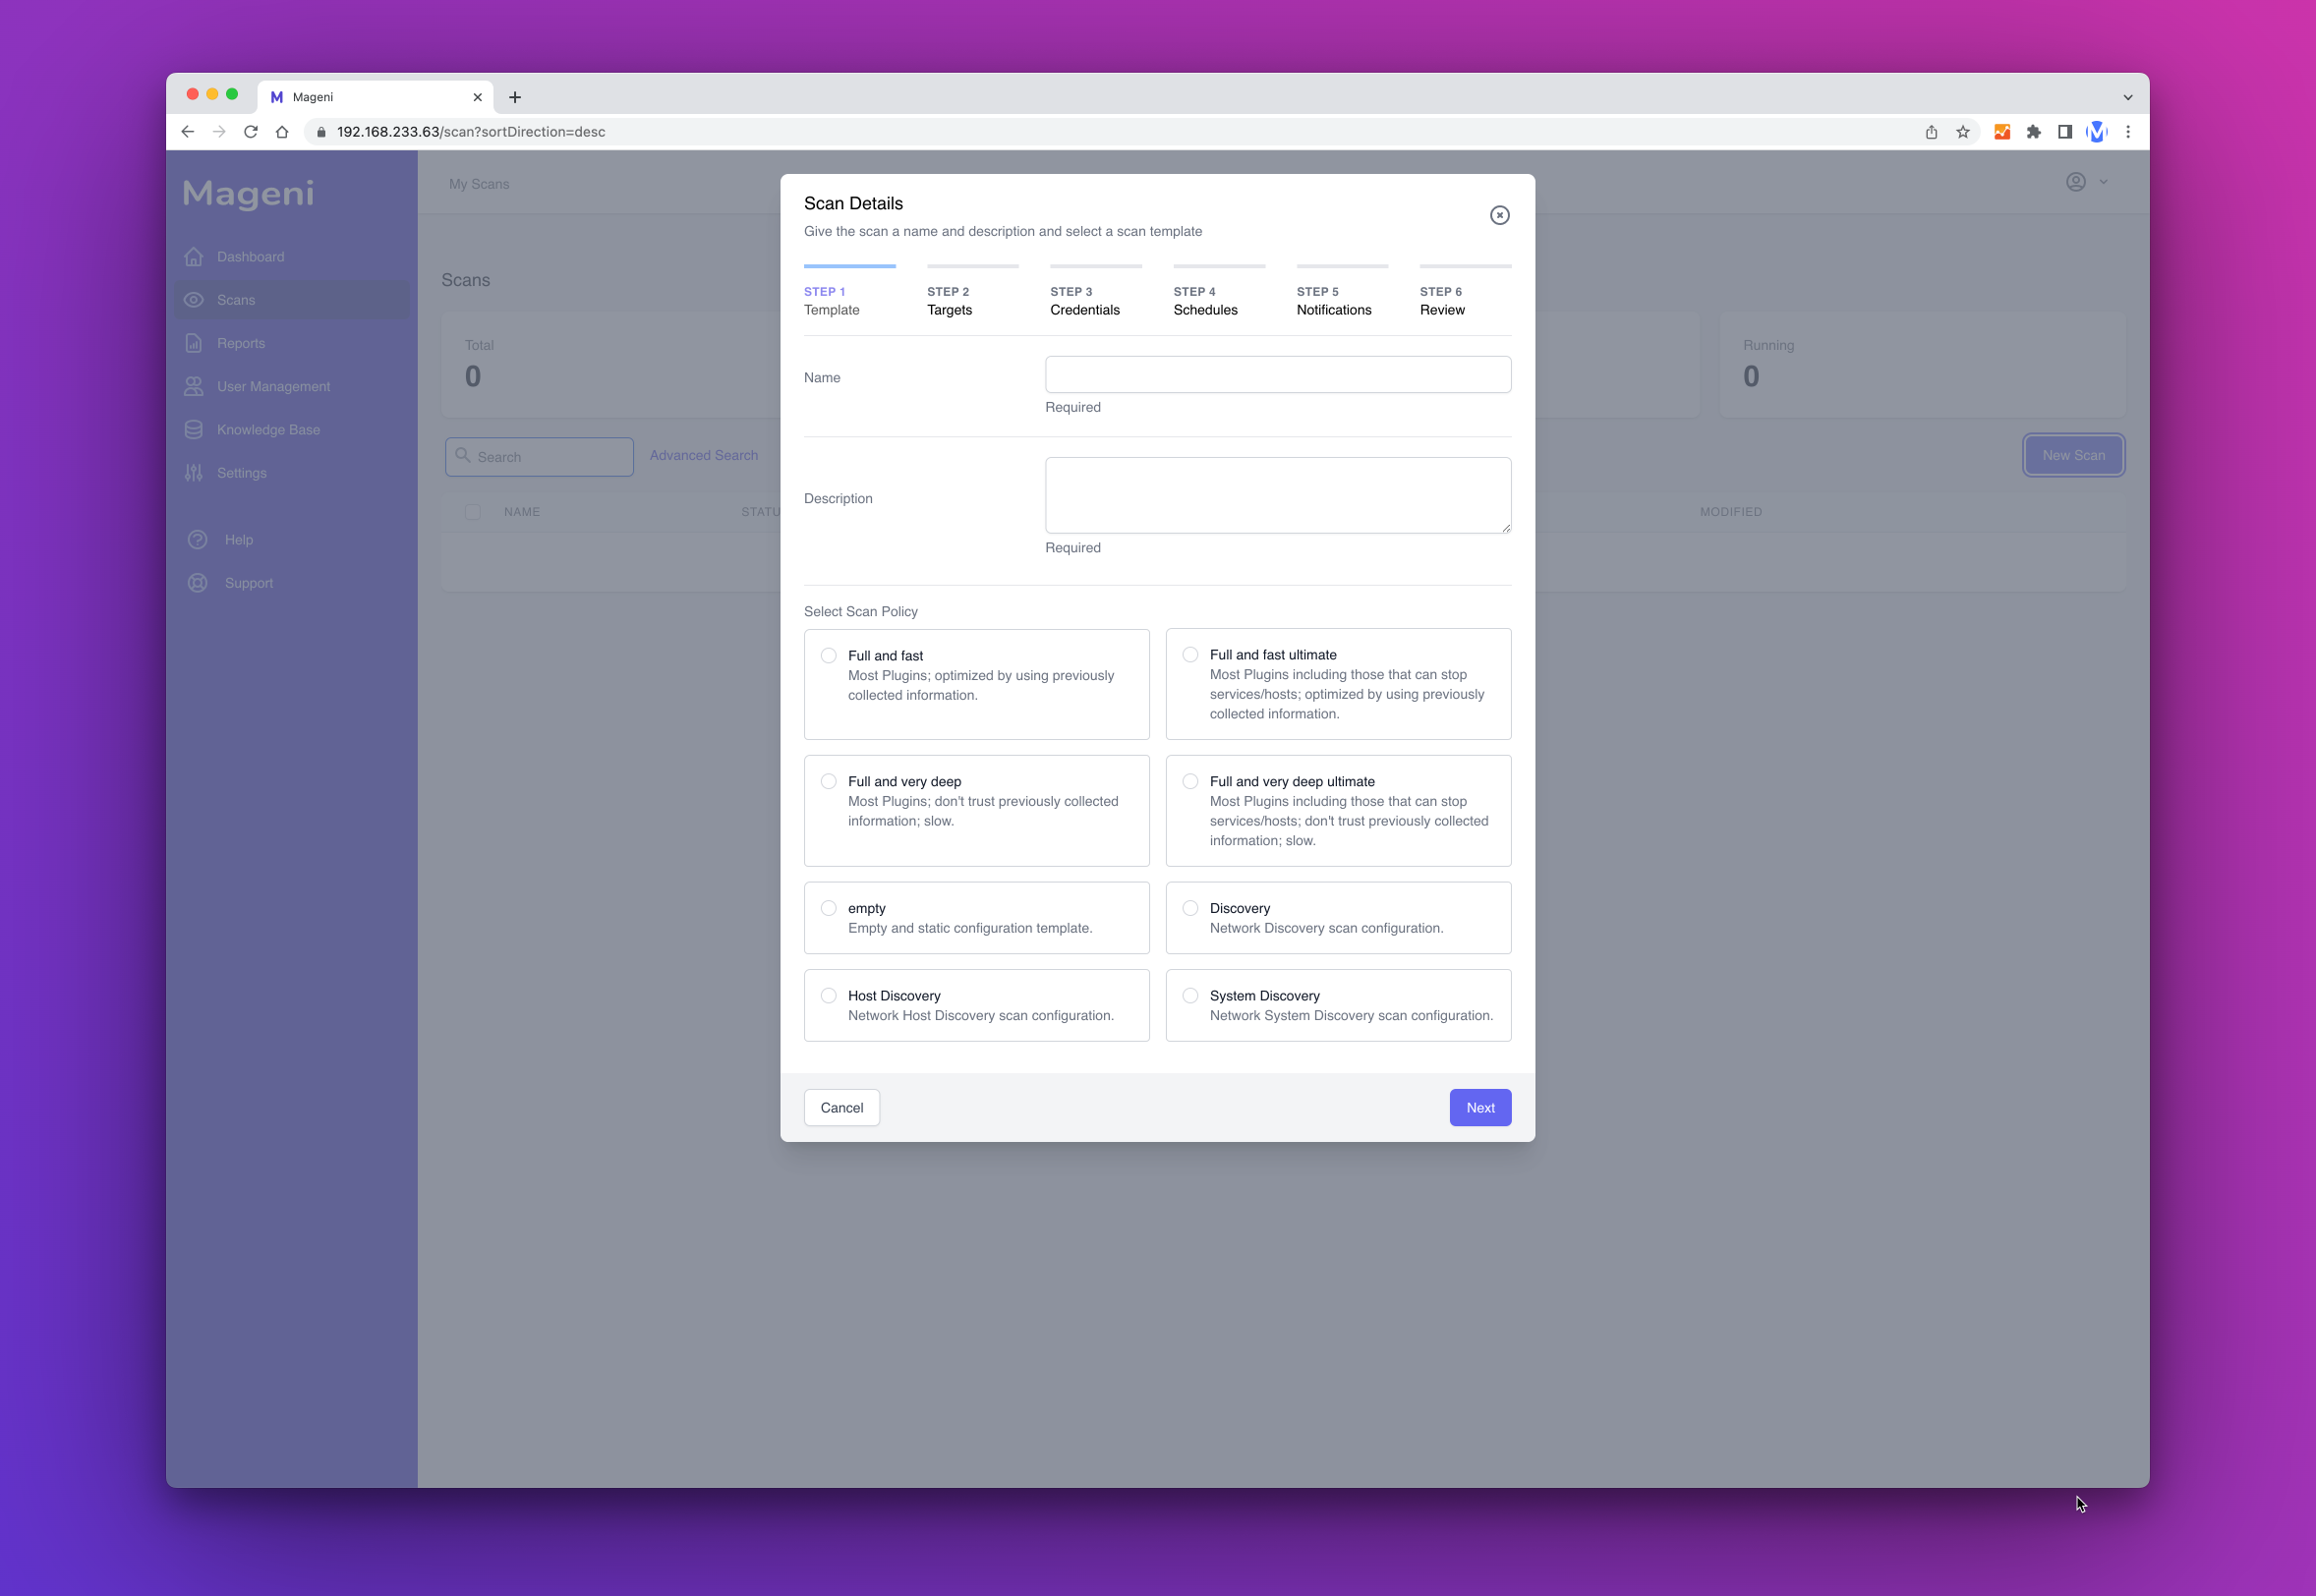
Once that you have chosen the name, description and scanning template click "Next Step"
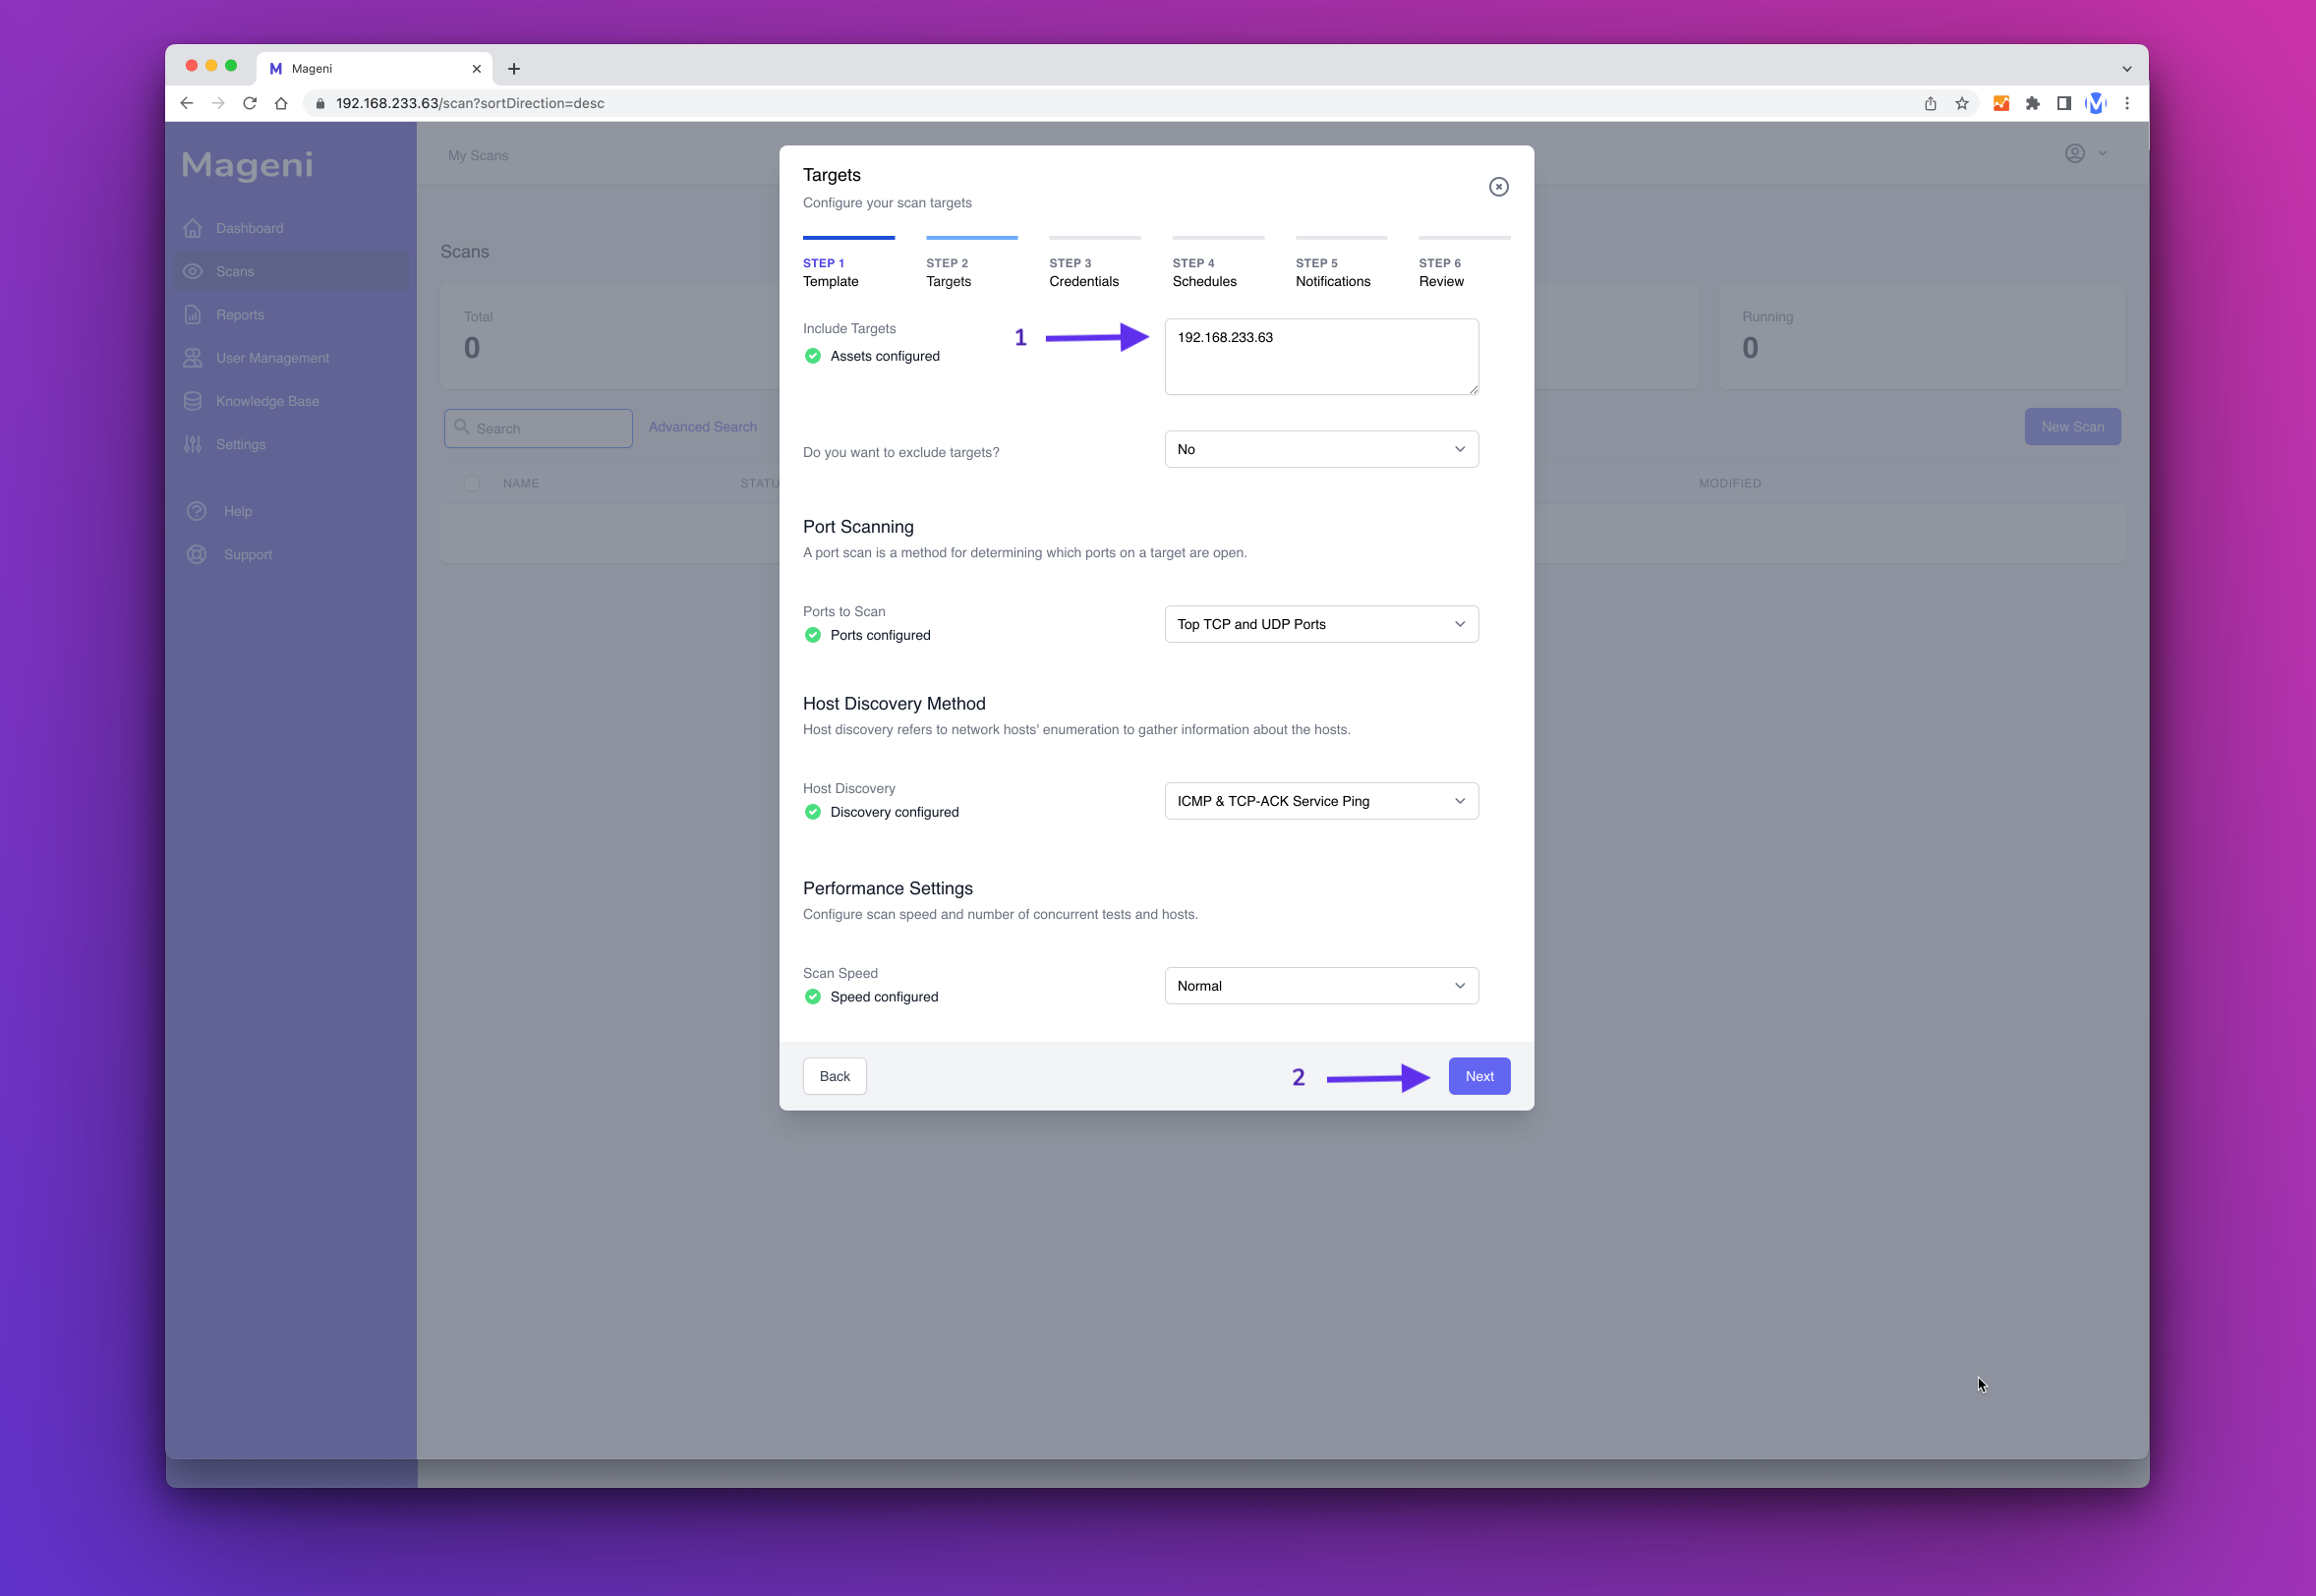
Next, include the targets or assets that you want to scan and click "Next Step"
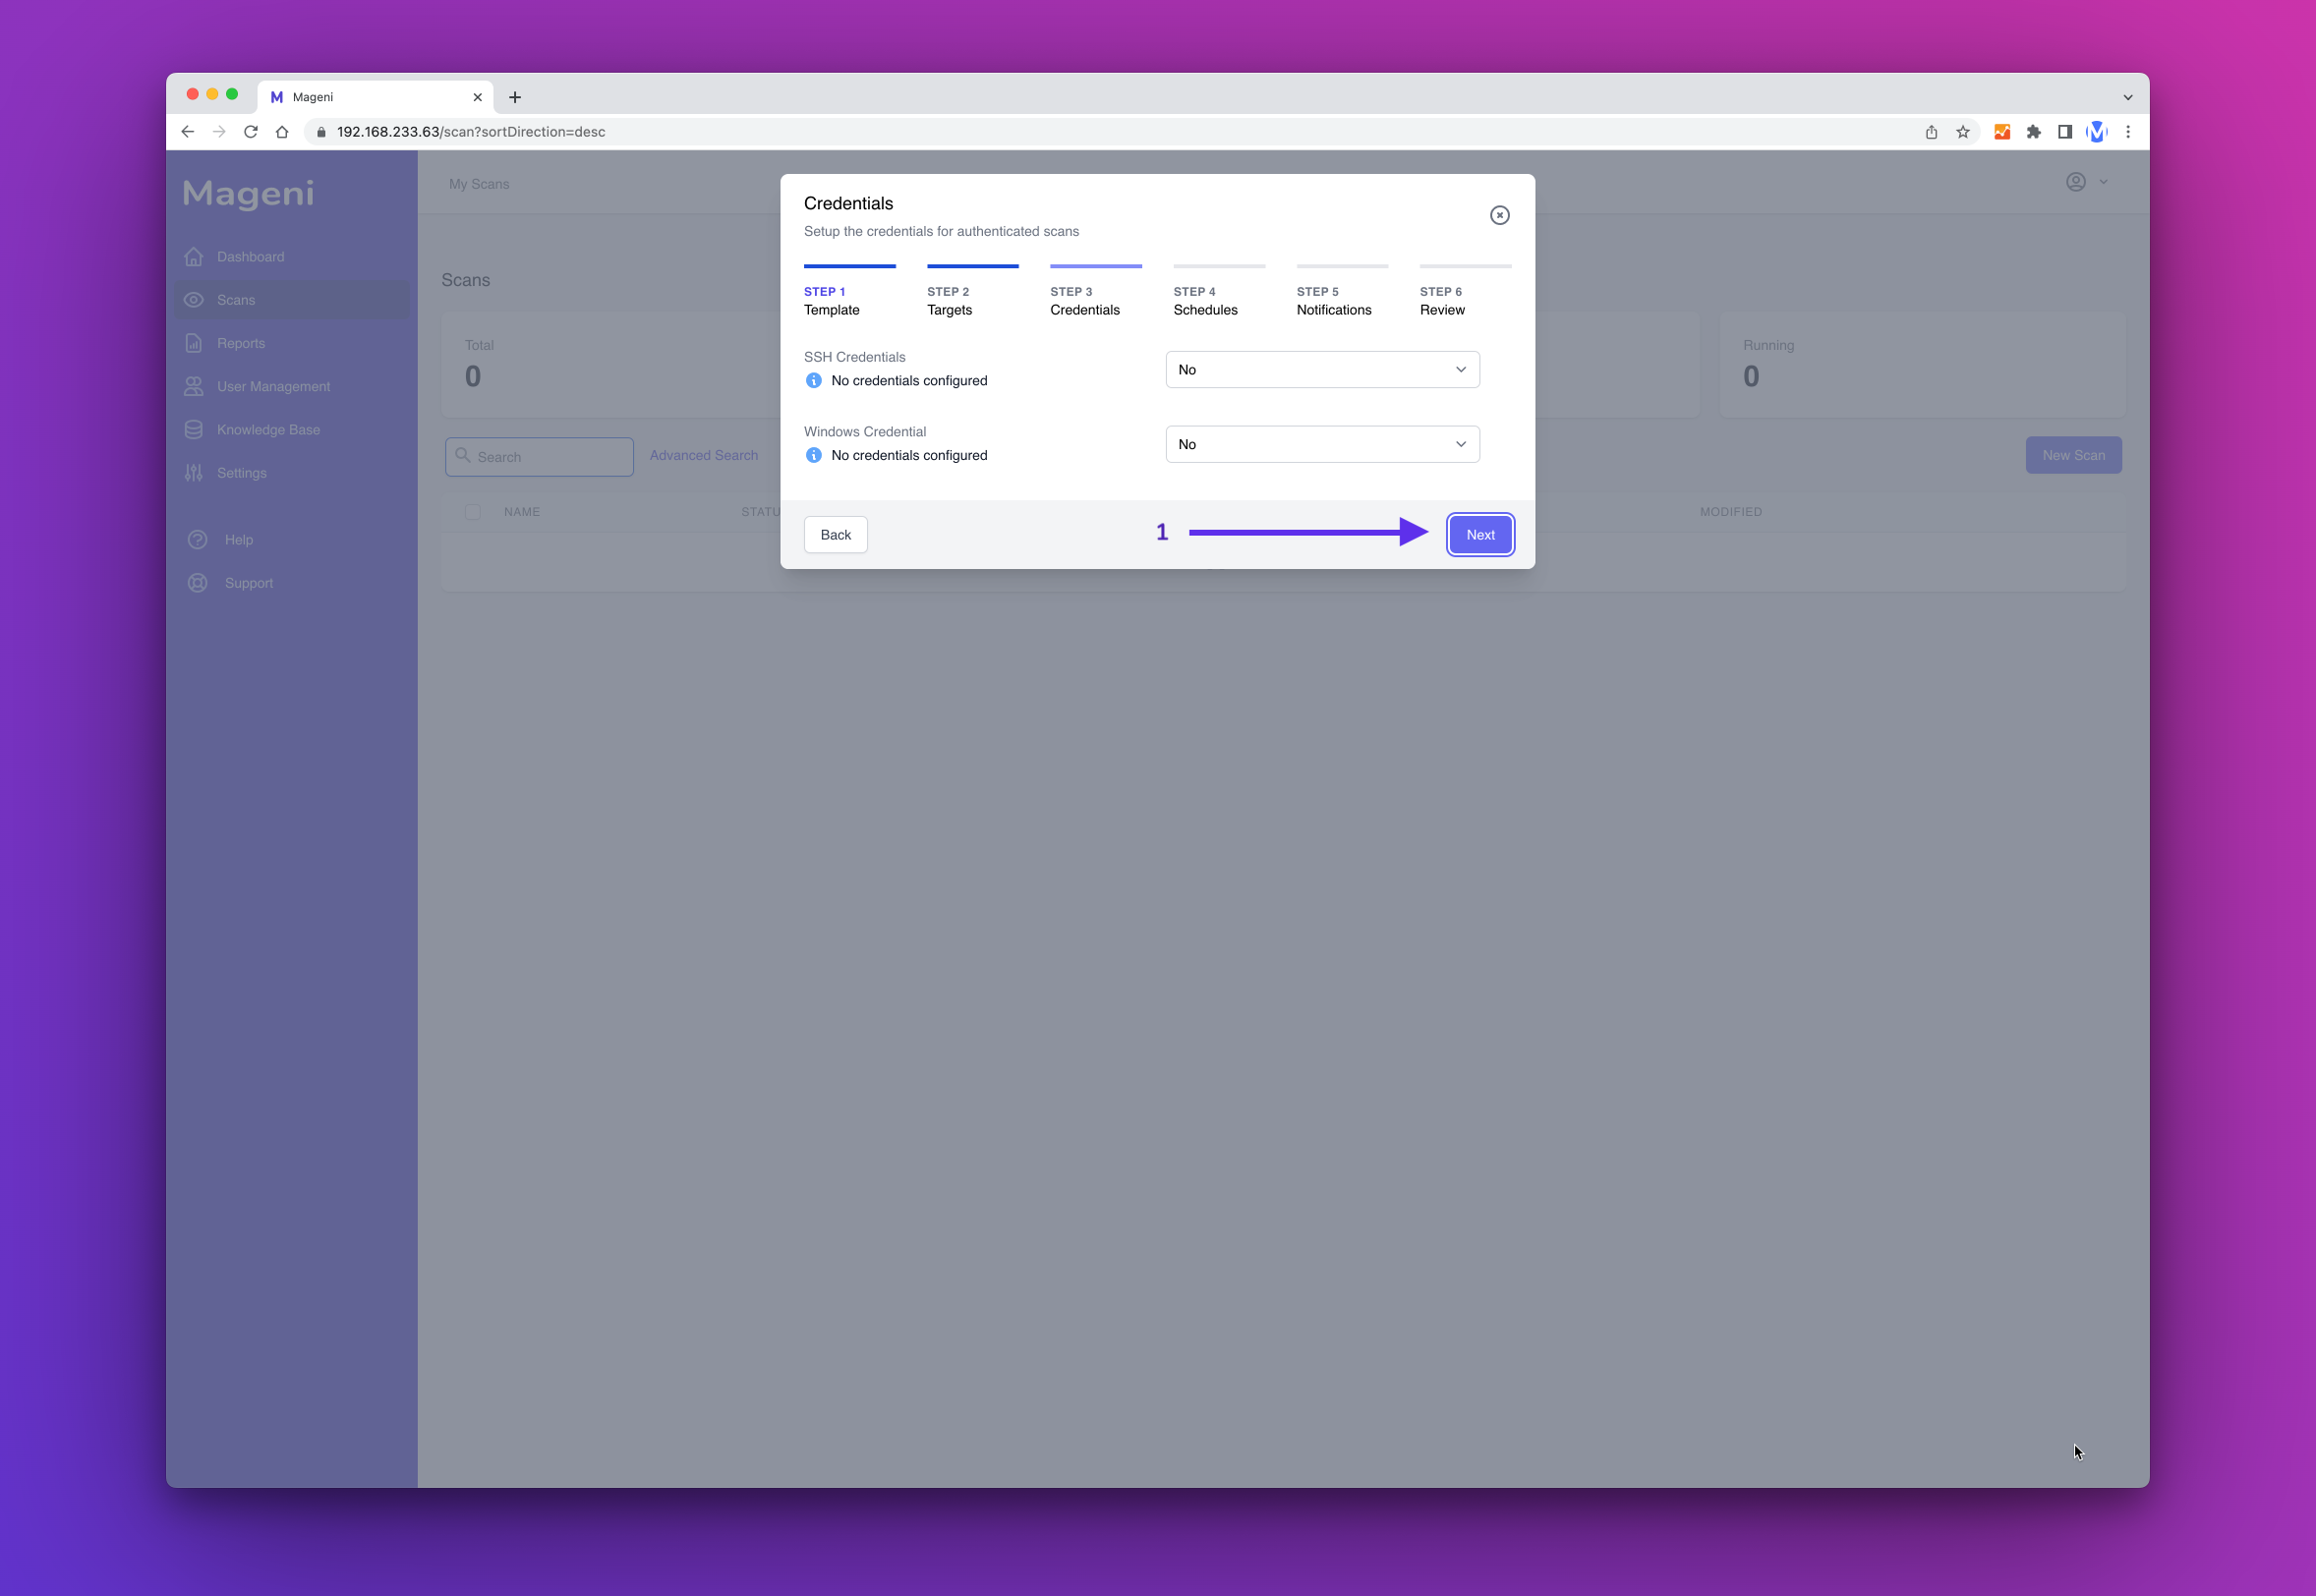
Next, you can define if you want to perform a credentialed or non-credentialed scan. For this example, we will perform a non-credentialed scan. So click "Next Step"
Next, you can define a schedule. In this example, we won't create a schedule. So click "Next Step"

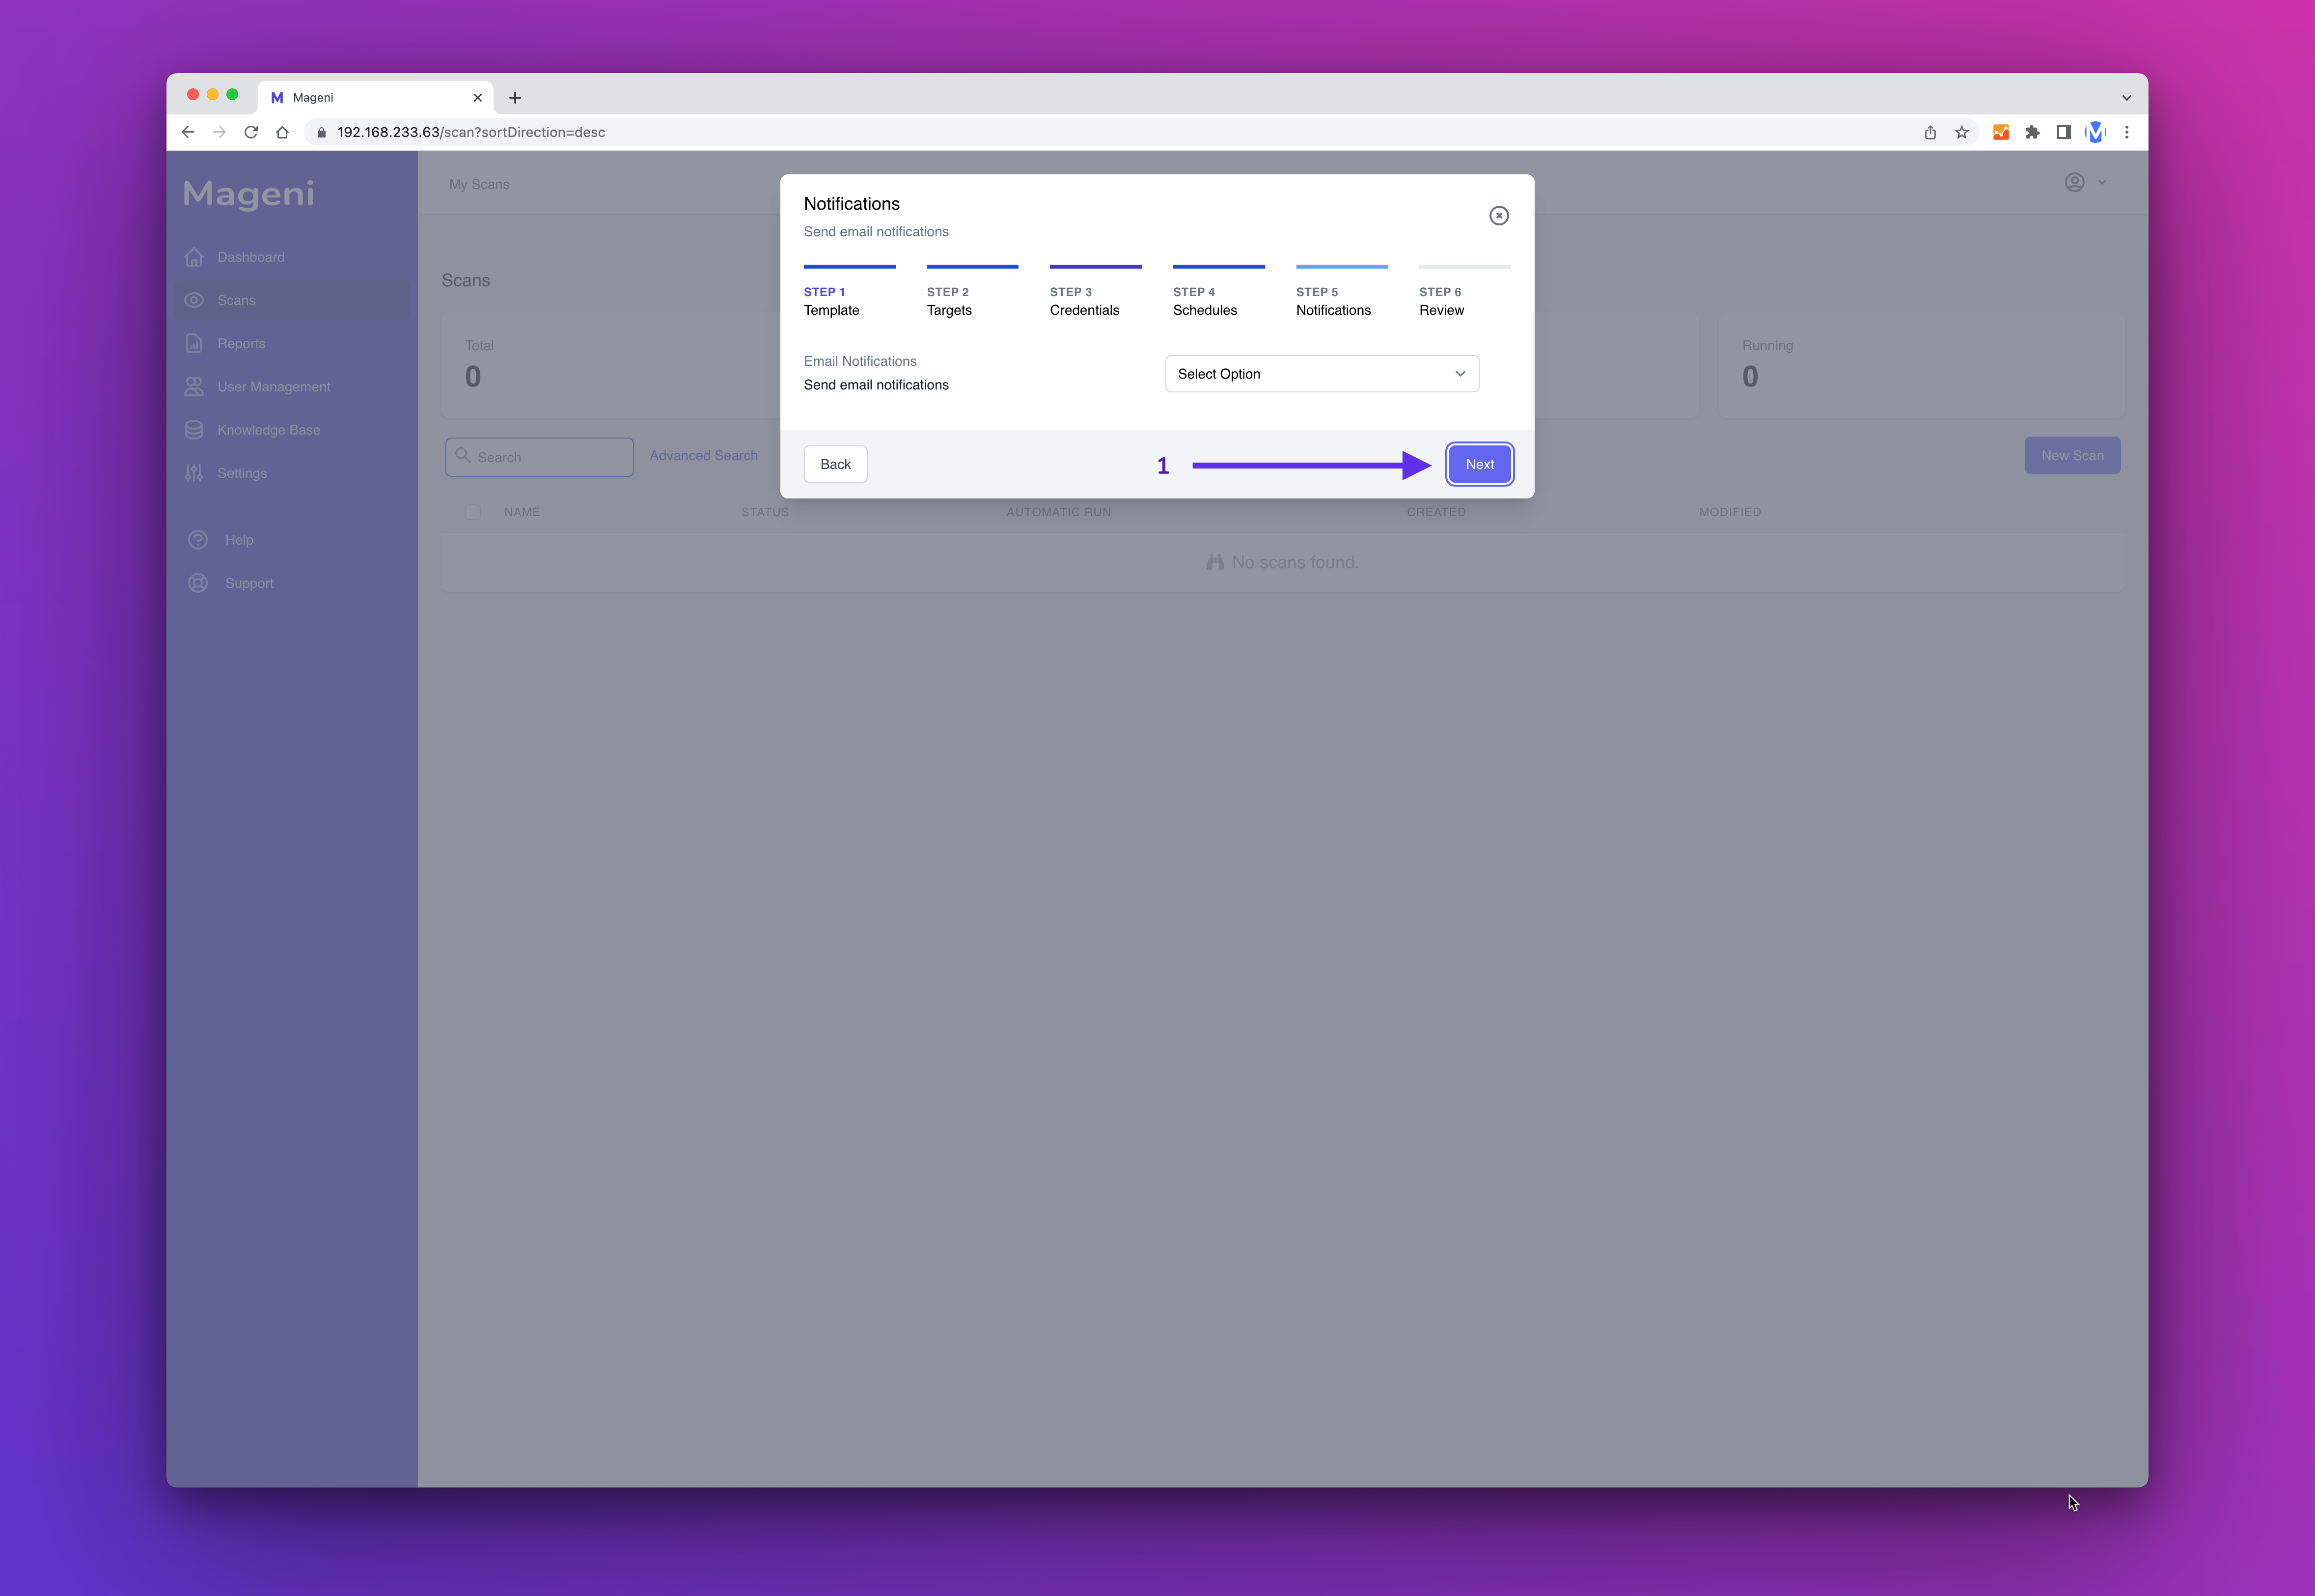
Next, you can create a notification. In this example, we won't create a notification. So click "Next Step"
Now, before you save the scan, you can review the information. If everything is ok, click "Save".
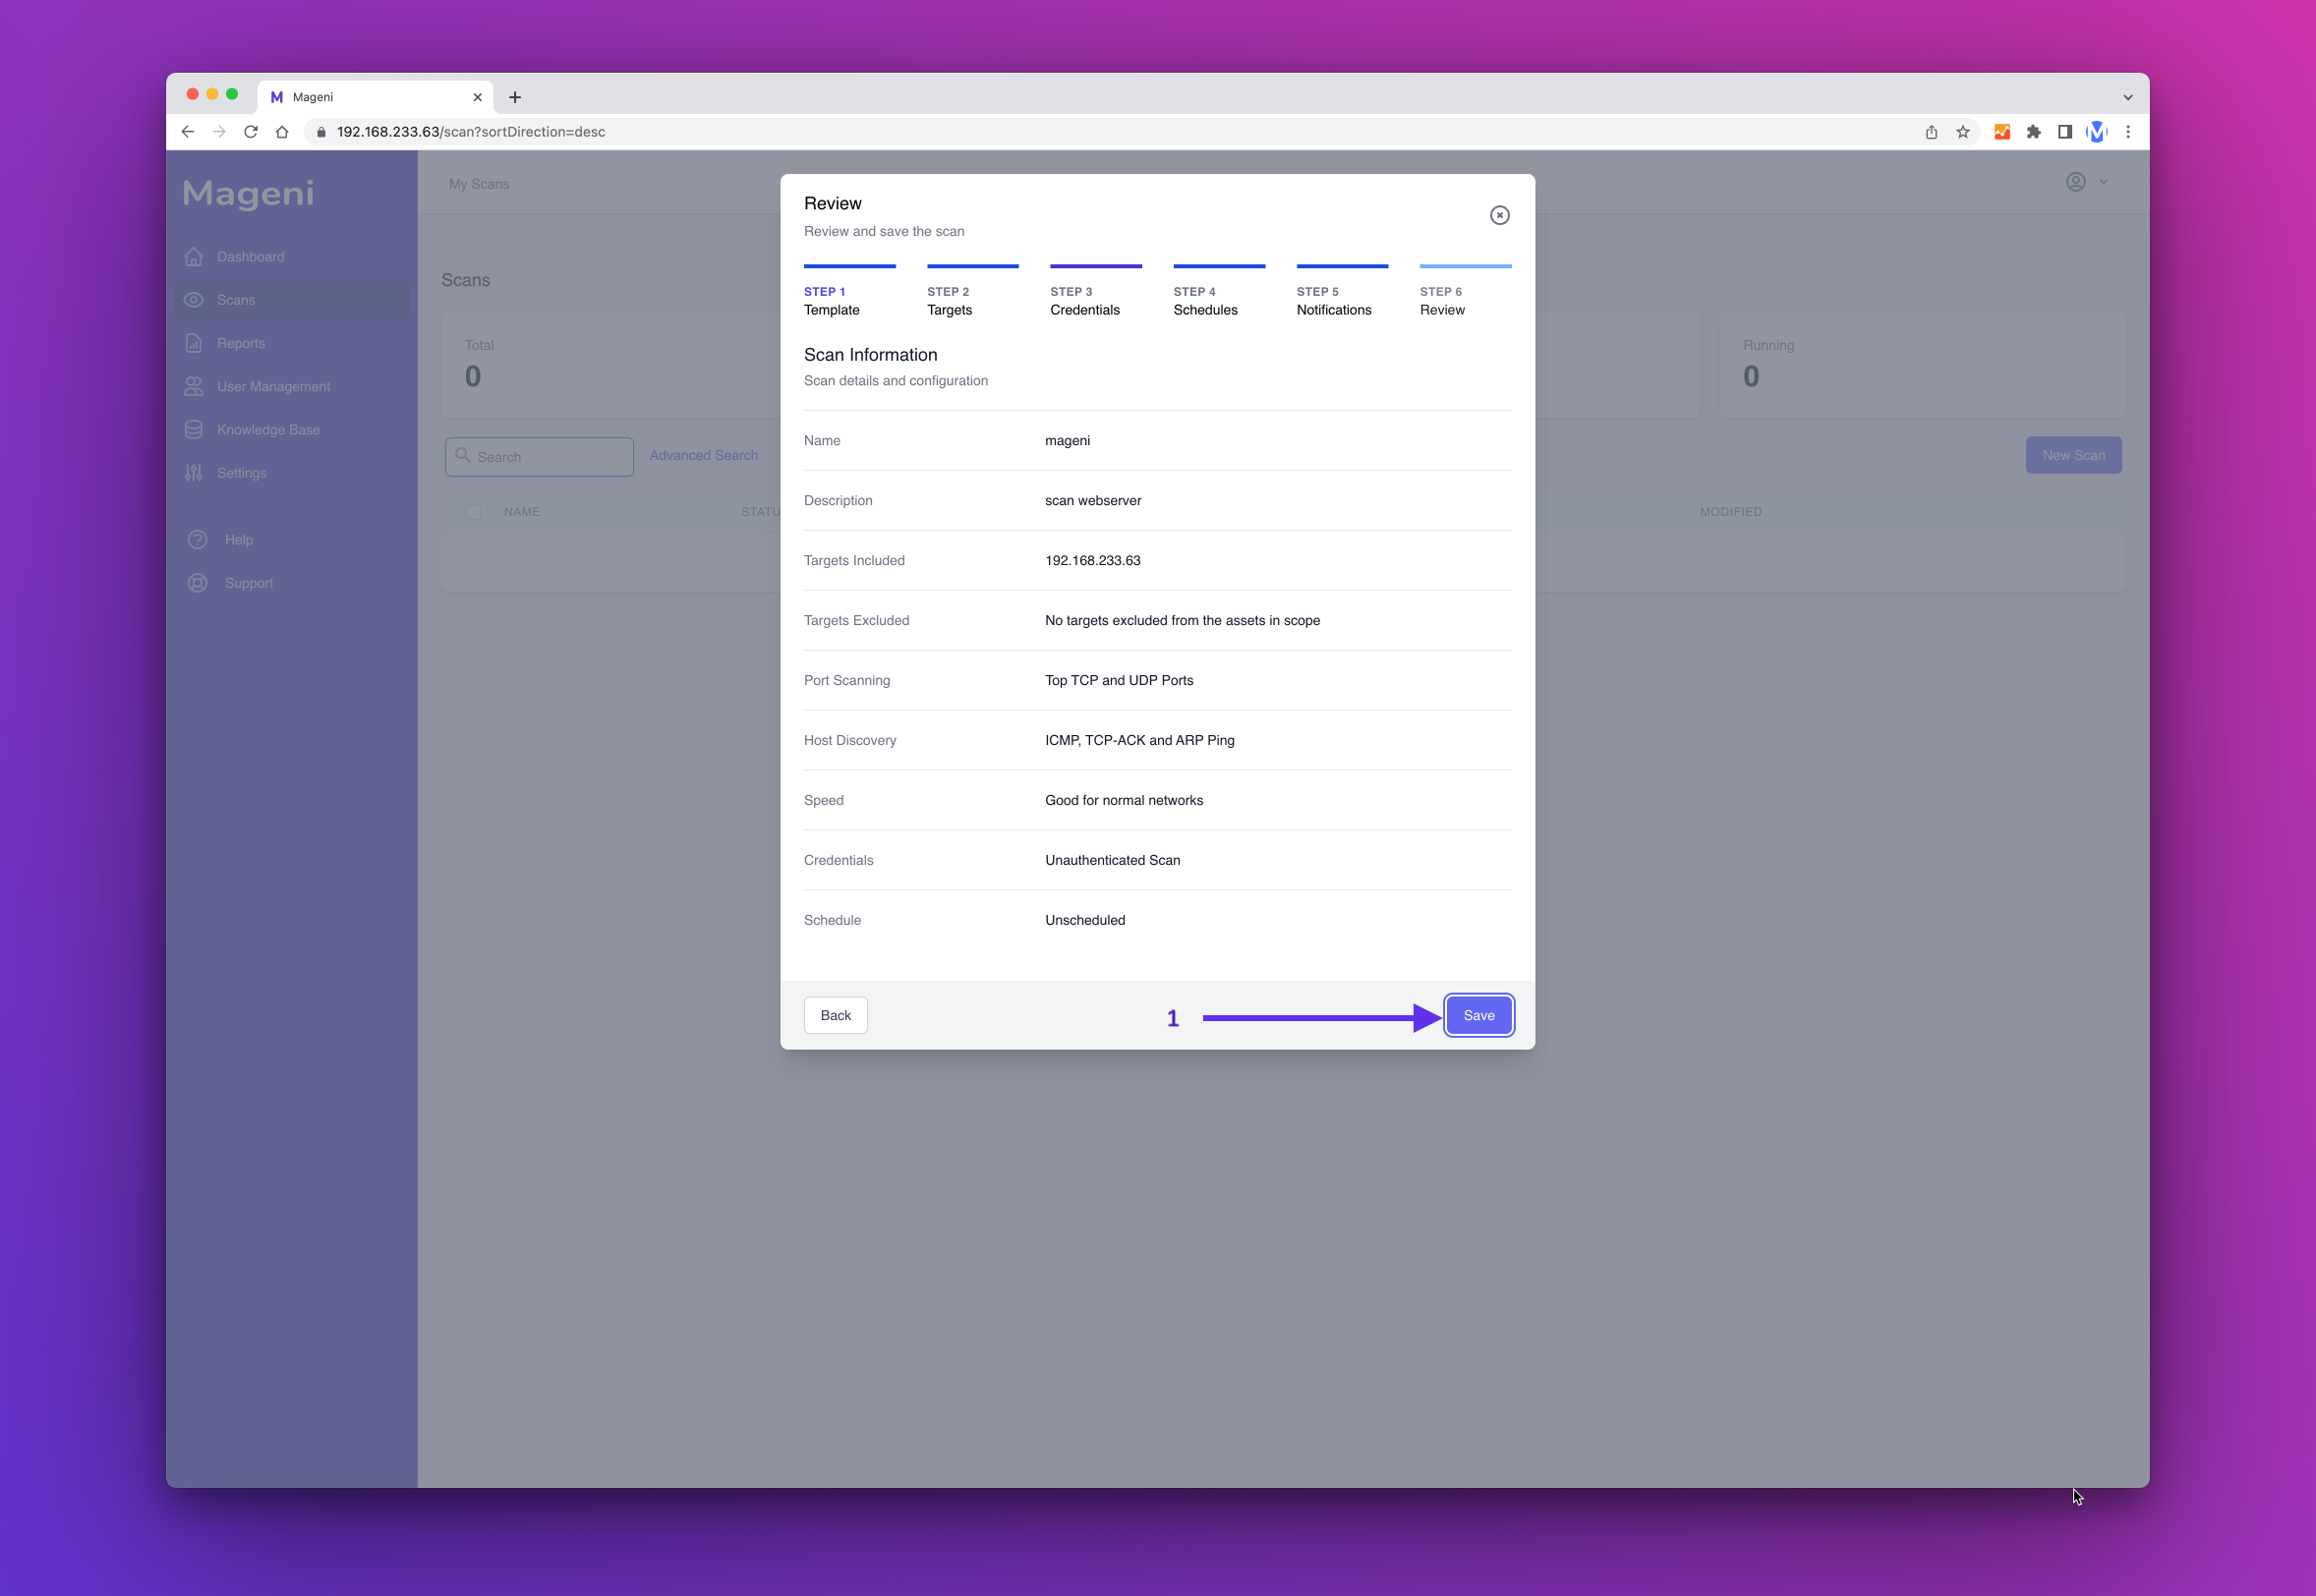
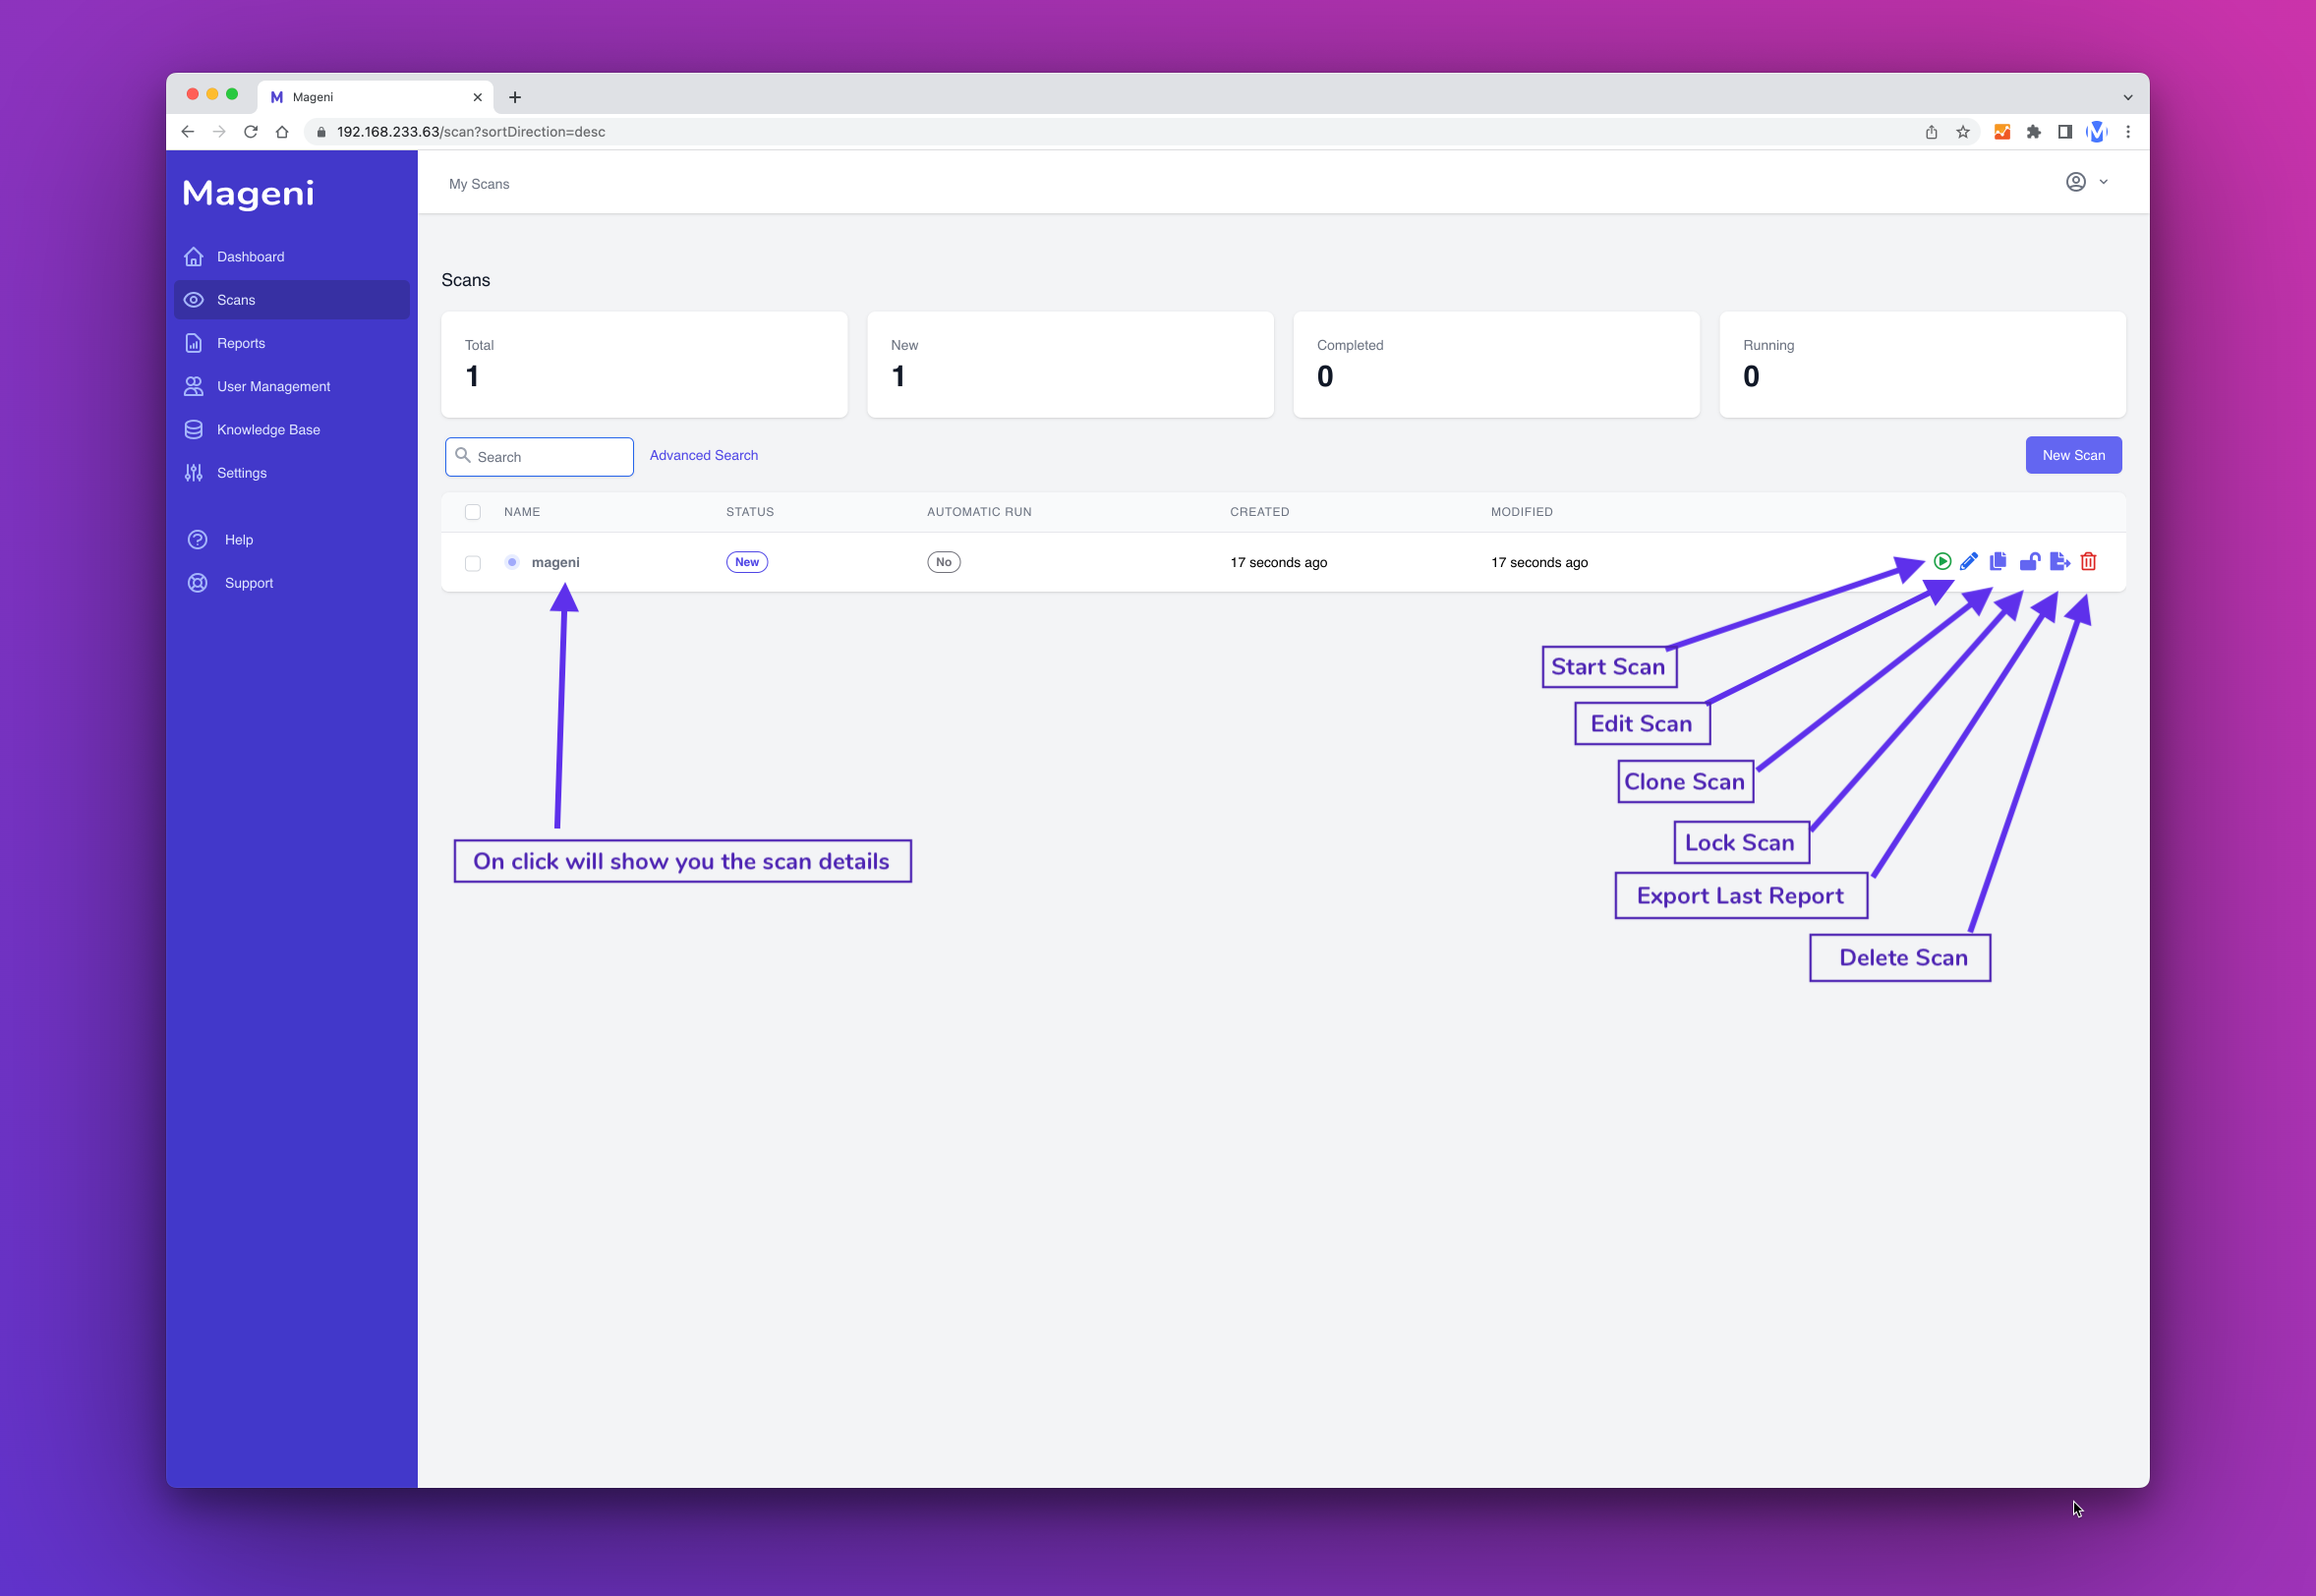
The scan has been saved and now you can see it on the scan Dashboard.
You can manage the scan from the Dashboard and perform these actions:
- Start Scan
- Edit Scan
- Clone Scan
- Clone Scan
- Lock/Unlock Scan
- Export Last Report
- Delete Scan
How to Update
To update, run
sudo mageni-feed-update